Posts
Before Daybreak

“Dedicated to one of Arizona’s greatest outdoorsmen and Lion Hunters- Mr. Michael Pock, New River, AZ. RIP Sir.”
The selfish intensity and passion of each moment
The memories that flood with each repetition
Different locales and different companions, but of course, mostly solitary
trying mightily to be part of the age-old blood sport of hunter and prey
The cavernous darkness outside the truck windows
Or the glow of fresh fallen snow beyond the tent flap
The smell of gun oil and leather, the feel of cartridges-weight forward of course
This should be shared, you feel, but company Would compromise the purity of emotion
This is better by tenfold, I reason, Than the months of daydreams and anticipation
Hours before the light, the darkness is my cocoon
In the early mountain chill or desert freshness
Moon glow silhouetting high rim rock,, ghostly saguaros or extinct volcanoes
Some night hikes that lead to dawn vantage points Will be remembered for a lifetime-
Elk bugles thundering From all points of the compass,
Climbing Malapai peaks with glasses fogged
Or the skunk at half a pace when I found God was merciful
It is the darkness, the before, like a book unopened That you know will thrill and engross you, memories unrivaled
Peppersauce Canyon, Cerro Prieto, Roberts Mesa or Kitty Jo mine
Some to be revisited, none to be forgotten,
All enmeshed In memory with each year’s pre-dawn rituals
I have discovered-slow I must be for it took 30 years
It is not success in the hunt most yearned for,
But rather one more preparation before daybreak
For the many memories to revisit me.
Sept. 2001
How to score a Coues Deer
(All photos are copyrighted by CouesWhitetail.com and are not to be used without permission. Thanks to Tony Mandile for editing some of my photos)
Background Information
I will describe the Boone and Crockett scoring system. The Boone and Crockett scoring system was established in 1932 and since then some modifications and clarifications have been made. The Boone and Crockett system rewards symmetry and mass. There are deductions for lack of symmetry, even in a non-typical Coues Deer. Coues deer are scored the same way as other subpecies of whitetail, but the minimum entry requirements are lower.
For the most part, other recordbooks, such as those for Longhunter Society, Pope and Young, North American Shed Hunters Club, and Safari Club International use the same measuring system which was developed by the Boone and Crockett Club. Safari Club International (SCI) is the only club that does not deduct inches for lack of symmetry and mass. SCI scores are roughly equivalent to a Boone and Crockett score before deductions (otherwise known as the gross score).
There are two categories for Coues Deer in the Boone and Crockett recordbook, typical and non-typical. A typical buck is one that has most of it’s tines coming off the main beam in the standard fashion for this subspecies. For a non-typical buck, there are several tines that come off the beam in abnormal fashion. In general, non-typical points are those that come off the side or bottom of the main beam, are located in an unusual place on the main beam, or branch off from a normal tine. When scored as a non-typical, those abnormal points are added into the score rather than subtracted as they are for a typical score. If a buck has many non-typical points it should be scored as a non-typical. A buck can only be entered into one of the two categories. The final decision on which category the buck is entered in rests with the hunter.
Boone and Crockett has two types of recordbooks. One is the All-time recordbook which records all entries since the system began. The second type is the Awards book which records all entries within the designated three year period that the book covers. There are different minimum scores for entry into the two types of recordbooks (Table 1).
[default_table]
Table 1. Entry minimums for Coues Deer by category and type of recordbook.
| Typical | Non-typical | |
| Awards book | 100 | 105 |
| All-time recordbook | 110 | 120 |
[/default_table]
If you would like to look at the Boone and Crockett scoresheets for typical and non-typical Coues deer, please click on the appropriate link below. These files are in PDF format and are courtesy of the Boone and Crockett club. Please visit the Boone and Crockett Club website for more information. The PDF scoresheet files take quite awhile to download (about 2 minutes), so if you have a slower connection, you might want to just look at the excel spreadsheets for an idea of how things are calculated.
Boone and Crocket for typical Coues Deer scoresheet (includes basic instructions and fair chase statement – PDF format – large file – 1.4 MB)
Boone and Crockett for nontypical Coues deer scoresheet (includes basic instructions and fair chase statement – PDF format – large file – 1.4 MB)
I also have some Excel spreadsheets that you can download if you would like. These are simple spreadsheets in which you enter your measurements and it will calculate the score of the buck. Feel free to save these spreadsheets on your computer for your personal use. I have saved them in an older version of Excel (ver. 5.0) so that most people will be able to load these.
Excel Spreadsheet for Typical Coues deer
Excel Spreadsheet for Non-typical Coues deer
How to score
The score of a buck is the sum total of several measurements taken on his antlers. Those measurements include the length of each main beam, the length of each tine, the circumference measurements along the main beam at four specific locations, and the greatest inside spread. All measurements are taken to the nearest 1/8 of an inch.
In order to take those measurements you need some equipment. For most measurements you want to use a 1/4 inch wide, flexible steel measuring tape with graduations in sixteenths of an inch. I find it is also very handy to use a flexible steel cable and an alligator clip to take measurements. For the inside spread, a carpenter’s ruler, which has the extendable section on it is best. I also find it helpful to use masking tape on the antler so that my marks are removable and they are easy to see for measuring.
The photos below show the basic equipment and techniques used for measuring the antlers of a Coues White-tailed Deer.
Let’s use the following buck to demonstrate some of the measurements. This buck has several features that make it excellent for demonstration.

Jeff McFadden holds the buck he got on the San Carlos Reservation during the October 2002 hunt.
Main Beams
The main beams are measured from the bottom and center of the outside edge of the burr to the tip of the main beam, following the middle of the outside of the beam. See photo below. The measurement is taken for both beams. To establish the center of the base of the beam (the burr), try to line up the antlers when viewing them from the side. Then look for the center of the outside of the burr. Do not start the measurement at the lowest leading edge of the burr or the lowest rear edge of the burr. It must be the center of the outside edge.

This photo shows using a flexible cable to measure the main beam. Note that the cable is to stay in the center of the outside of the beam. The angle of this photo makes it look like the base of the cable isn’t in the center of the beam by the burr, but it is. To determine the center try and line up the antlers when viewed from the side.
Tine Lengths
Tine lengths are very important measurements and can be somewhat difficult. The critical part is marking the baseline correctly. The baseline of the tine is where it meets the main beam. But generally the tine spreads out at the base and so you want to make sure you are really marking the baseline, not just the swelling where the tine meets the main beam. Many people who are not certified measurers will make this mistake, which results in shorter tine measurements. All tines are measured on the rack as long as they meet the definition of a legal point. In general, that definition is that they must be at least 1 inch long and longer than they are wide.


Marking the baseline. See how the tine swells as it nears the main beam? To make the proper mark, the baseline should be below the noticeable swelling of the main beam created by the “influence” of the tine. This may be easier to see in the lower photo. Many people would incorrectly mark the baseline higher than is show here, resulting in shorter tine lengths. Note also the use of masking tape in the upper photo to make it easier to see your mark and to make the marks removable. If you don’t have masking tape, you can use a pencil to make your marks.


The baseline should be drawn so that it follows the natural curve of the beam. The photo on the left demonstrates how the baseline follows the curve. See how the curve in the cable is the same as the curve in the bottom of the main beam. The photo on the right demonstrates the incorrect way to draw a baseline. In that photo, the cable is pulled straight and is not following the curve of the main beam.

After drawing the baseline, you must determine the center of where the point meets the baseline. You can do this by using your fingers to mark the edges of the tine as it comes into the main beam. Then put a mark on the baseline to indicate the center (that mark is not shown in this photo, but would be made at the center point of the tine where it meets that blue baseline).

Points are measured from the center of the tine where it intersects the main beam to the tip of the point (or from the tip to the baseline). Here I use a flexible steel cable and an alligator clip to get the length. Then the cable is stretched against a measuring tape to get the measurement.
Abnormal points? This buck does indeed have an abnormal point. Look at the photo of Jeff holding his buck. On the buck’s right antler, look at the third tine. There is a point branching off it. That makes it a non-typical or abnormal point. But which point is the normal one and which is the branch? In order to determine that, you have to decide where the baselines are for each point. If both tines came off the main beams, but shared some antler material, they would be a special case called “common base points”. However, in this case, one point branches off the other and does not arise from the main beam. If you take a look at the photo of Jeff holding his buck again, you can see that the tine that arcs back toward the second tine is the one that branches off the normal third tine. Abnormal points are measured very similarly to normal points. The difference is that the baseline of the point may not be on the main beam. In this case the baseline is drawn where the abnormal point intersects the normal 3rd tine. The measurements for abnormal points are placed a special section in the upper right-hand side of the scoresheet. The total of all abnormal points is added into a non-typical score, but subtracted from a typical buck.
Legal points? On Jeff’s buck, notice the small point coming off the top of the main beam near the end of the left beam. Is is a legal point? In order to be a legal, measurable point, it must be at least an inch long and wider than it is long. In this case, that point does not meet the definition of a legal point and therefore is not measured.
Circumference measurements
For Coues deer, as with other whitetail, there are four circumference measurements on each main beam, regardless of how many tines the buck has. This is another area where novice measurers make a mistake. They may only take 3 circumference measurements on a 4 point buck. The four circumference measurements are taken in the following locations. The first is taken at the smallest place between the burr and the first point. The second is at the smallest place between the first and second points. The third is taken at the smallest place between the second and third points. And the fourth is taken between at the smallest place between the third and fourth points. However, in Coues deer, the fourth “point” is generally the tip of the main beam. In that case, the measurement is taken 1/2 way between the third point and the end of the main beam, as shown below. If the buck has no third point, then the 3rd and 4th circumferences are exactly the same and are taken 1/2 way between the second point and the end of the main beam.

Photo showing proper placement of the fourth circumference measurement on a Coues deer if the buck does not have a fourth tine. It is taken at the 1/2 way point between the third point and the end of the main beam because Coues deer rarely have a fourth tine. If the buck does have a fourth tine then the measurement would be taken at the smallest place between the third and fourth points.
Inside Spread
The inside spread measurement is the taken at a right angle to the centerline of the skull at the widest point. Using a carpenter’s rule makes this measurement easier to take. The ruler should be touching the center of the main beams on each side, unless one antler is significantly higher than the other.

Use of a carpenter’s rule to measure the greatest inside spread. You can see the extendible brass section of the ruler on the left hand side of the photo. Note that the measurement is taken at a right angle to the centerline of the skull. In this photo, the differing lengths of the main beams makes it look the measurement is skewed, but note the position of the ruler in relation to the skull plate.
Tip-to-tip and Greatest Outside Spread
There are other measurements that go onto the B&C scoresheet, but they do not influence the score of the animal. They are used to help distinguish one rack from another.
The tip-to-tip spread is simply taken by stretching the tape between the center of each tip of the end of the main beam. This does not have to be at a right angle to anything. So if one beam is higher than the other, it makes no difference.
The greatest outside spread is one that is generally taken by laying the rack down at a right angle to a wall and marking the widest point, whether the that is the main beam or a point.

Here I am taking the greatest outside spread measurement. The ruler on the left helps locate the proper outside edge. Note that in this case, the greatest outside spread is widest where the third points bow out. To take this measurement, I would mark where the straightedge is hitting the concrete and then measure the distance to the wall, making sure it is at a right angle to the wall. You can use the special type of ruler shown here to determine the right angle.
Greek Bacon Backstraps
By Clay Price
This is a very tasty treat
- Venison Backstraps
- Bacon
- Cavender’s Greek seasoning
- Salt & Pepper
- Butter (1 stick)
Slice the backstrap into medallion steaks, then take one strip of bacon per steak and wrap around the outside of the backstrap steaks and secure with a toothpick. Next salt and pepper both sides of the steak. Get the BBQ heated and while it is heating start your topping. Take a small pot and put your butter in it and melt it on the lowest setting. You want to make sure you do not burn the butter. After the butter is melted put as much Cavenders greek seasoning in as you want (I like lots) stir this up. Put the steaks on the grill and as they cook pour the greek butter on top and flip and repeat till done. Cook till desired and serve up. You can add wine to the butter sauce if you like.
Green Chilli Burros
By Kimberlee Kreuzer
The basics are:
- Make a roast (beef chuck, elk chuck, venison combined with a small pork roast). I put onions garlic and some beef bullion cubes and water in a pan with the roast and slow cook it till falling apart.
- Remove the water from the roast and shred up the meat.
- Add a couple of small cans of green chilies, some tasty salsa, cumin, red chili powder and most of a can of cream of mushroom soup, garlic salt.
- Heat it up, taste it add whatever is lacking out of the previous ingredients and call it good.
It seems like my total weight of the meat is usually 4 pounds or so.
Venison Peppersteaks
By Phillip Metcalf
This is probably one of the easiest venison recipes around but is so good!
- 1-2 pounds Venison Steaks (perferably 3/4″ to 1″ thick)
- 1 Large Sweet Onion
- 1 Large Green Bell Pepper
- 1 Large Red Bell Pepper
- 1 Small Jalapeno pepper
Layer the bottom of a large stew pot with the sliced Onion rings.
Follow this by layering the Green, Red Bell Peppers and Jalapenos on top.
Lay the Venison Steaks over the bed of onions and peppers.
Cover all with water about an inch above the meat.
Bring to a rapid boil and immediately reduce to a slight simmer.
Cover and cook for about 1 hour watching that it doesn’t dry out.
Make a white sauce gravy by thickening the juice with flour of cornstarch.
Season to taste.
Server by spooning this over a bed of White rice.
Serves 4-6.
Tasty Backstrap!
By Jeff Rogers (Desert Bull)
This works great for all game, as the oil adds fat (TASTEY!) that is missing from most game animals. The acid from the lime and soy/worsteshire helps tenderize.
- 4-6 – 1″ thick back strap fillets, sirlion steaks, or tenderloin
- 1/2 cup GOOD olive oil
- 2 tablespoon of diced garlic. FRESH
- 1 table spoon of grated ginger FRESH
- 1/2 cup of EITHER Soy or Worsteshire
- Juice of one lime FRESH
- 1/4 cup red wine (optional)
Trim fat from meat, pucture meat several times with a fork. Lightly salt and pepper.
Place meat in large zip-lock bag and pour marinade over the meat. Refridgerate for at least 4 hours or over night.
Prepare the rest of your meal, salad, potatoes, etc. You don’t want to cook the meat first then have it sitting around while the rest of the meal finishes. You want the meat to go right from the grille to the table.
Place meat on HOT grille. Retain the used marinade for a sauce (optional). Cook until medium rare. It will continue to cook for a few minutes after removing it from the grille, so don’t over cook it. Overcooking is the main reason that some people turn up their noses at game meat.
To make the sauce, pour the marinade into a sauce pan and add a little wine or apple juice to it (1/4 cup or so), throw in couple of pepper corns, 8-10 cherries (fresh or dried), and a bay leaf. Boil until the mixture reduced by 1/2. Strain into a serving dish and pour over meat. DO NOT EAT THE USED MARINADE UNLESS YOU HAVE BOILED IT.
Snake Lay Venison Marinade
- Equal parts of: Water and Soy sauce (I use 1 cup each for a full back strap)
- 1 tsp: Dry ginger powder
- 1 tsp: Black Pepper
- 1 tsp: Red Pepper
- 1 tsp: Cinnamon (you can try it with or without this ingredient. I like it!)
- 2 tsp: Sugar
- 3 cloves of minced garlic
- Juice of ½- 1 lemon (fresh squeezed is the best)
- 1 tbsp: Panola Gourmet Pepper Sauce
Mix ingredients and marinade. I have marinated venison from 1 hr to 48 hrs with excellent results.
Optional: Wrap venison with bacon and tie with string before cooking.
Venison cooked in a smoker should be on for about 45 minutes. Venison cooked in a rotisserie should only be cooked 20-30 minutes.
Venison Nuggets
By Tony Villegas
This is a favorite with my three critters (ages 4,6,16).
- 1 cup of flour
- 1 tablespoon of cumin
- 1 tablespoons pepper
- 1 teaspoon salt
- 1teaspoon garlic
- 2 eggs
- 2 pounds venison cubed
Mix all dry ingredients together then mix eggs in separate bowl. Preheat pan to medium heat then add oil (1/4 cup) I prefer to use olive oil. Dip cubed meat into eggs then dip into flour mixture. Cook for about ten minutes, turning cubes to brown all sides, or until they are done which ever comes first. Drain on a paper towel then just pop away.
Excellent Venison Steaks
By Marlon Giese
This is an interesting and tasty way to cook up some steaks.
Marinade:
- Cover steaks with water
- Add about a TBS of salt, mix well
- Then add 3-4 TBS of vinegar
Let steaks marinate for several hours in fridge
Then take them out and pat them dry and pound with meat mallet to flatten.
Lay a strip of uncooked bacon on it. Roll it up and fasten with toothpick.
Fry/brown on two sides and then put in oven at 350 degrees for ½ hour.
Super Easy Crockpot Venison
By AZ4Life
- Deer shoulder roast (or other type of roast)
- Apple juice
- potatoes, onions, mushrooms, celery, salt and pepper
The apple juice doesn’t really give it an apple flavor, but makes it excellent. Takes some of the gamey taste out, so it tastes just like beef. Cook on low for 6-8 hours or overnight.
Dutch Oven Deer Roast
By Casey Charter
- Deer shoulder roast
- 2 cans of cream of mushroom soup
- potatoes, onions, mushrooms, celery, salt and pepper
Heat up your dutch oven. Put in roast and the 2 cans of mushroom soup. Let it cook for about half an hour. Add the potatoes, onions, mushrooms, celery, salt, pepper and anything else you want in it. Cook until meat is tender.
Venison Jerky – Regular version
By Tim Wilhite
- 6 tsp black pepper
- 6 tsp salt
- 2 cups beef boullion (4 cubes)
- 1/3 C brown sugar (optional)
Marinate the venison for 12-24 hours. Smoke the jerky in a smoker for several hours (usually 2-3 hrs) until it reaches desired dryness. You can also use a dehydrator or an oven set to a low temperature.
Venison Jerky – Southern California version
By Tim Wilhite
- 1/2 C soy sauce
- 1 1/4 tsp onions
- 5 Tbsp. Worchestire sauce
- 1 tsp nutmeg
- 1 1/2 tsp black pepper
- 1 tsp ginger
- 4 garlic cloves – pressed
- 10 tsp liquid smoke (but Tim recommends only using 2)
- 5 tsp dried pepper (Tim recommends only using 2 1/2)
Marinate the venison for 12-24 hours. Smoke the jerky in a smoker for several hours (usually 2-3 hrs) until it reaches desired dryness. You can also use a dehydrator or an oven set to a low temperature.
Juniper Venison with Orange Cherry Chutney
Created by Linda Burch
1 large or 2 small quality venison roasts (total 3-4 pounds)
Marinade:
- 1 cup Merlot wine
- ½ c. apple cider
- ¼ c. light soy sauce
- ¼ tsp. garlic powder
- 1 T. worstershire sauce
- 1 T. Juniper Berries
- 1 bunch finely minced green onions (lightly crushed using mortar & pestle)
- ¼ cup canola oil
Pierce roast all over with long tined fork.
Marinate overnight or 24 hours.
Remove meat and set aside ¾ cup of marinade.
Place roast on rack in covered dish with 1-1/3 cups of apple cider.
Roast for 3 hours at 325 degrees or until desired doneness.
Check periodically and do not overcook.
Pour 3 cans of beef bullion into saucepan, boil and reduce to one cup.
Add ¾ cup reserved marinade and 1 cup of drippings from roast. Add 1 T. brown sugar.
Cook and stir. Add small amount of flour thickening if desired.
Slice roast very thin and serve with sauce poured over. Serve chutney on the side and garnish with very thinly sliced oranges. Thick cut venison steaks may be substituted and grilled instead of roasted.
Orange Cherry Chutney
(Prepare at same time as marinade the day before):
- Two oranges, peeled, sectioned and sliced
- ¾ cup fresh cranberries
- 4 ounces dried cherries
- ¼ cup sugar (or more, to taste)
Place orange slices in food processor and mince fine. Put in bowl. Place cranberries in food processor and mince fine. Add cranberries and whole dried cherries to oranges. Add ¼ cup sugar and mix. Refrigerate overnight.
Venison Pot Roast
By Amanda Moors
- 2-3 lb roast
- Sesame oil
- 1 can (29 oz) crushed tomatoes
- Sesame oil
- 1 onion – chopped
- Penzey’s Black and Red Spice (basically a black and cayenne pepper mix) – amount is up to you, I do alot!
- 2 garlic cloves – chopped
- 2 C. hot water
- 1 tsp. beef bullion
- 1 C. (or more) red wine
- 2 bay leaves
- 4 large carrots, chopped
Rub the roast with the black and red pepper mix. Brown the roast in the seasame oil. I generally make this roast in a crockpot, but it can be done in a pressure cooker or on the stove as well. For the crockpot, remove the roast from browning skillet and put in the crockpot. Add all the remaining ingredients into the crockpot. Let cook for 8 hours or more until you reach desired doneness. You can also use this recipe if you have smaller bits of venison instead of a full roast – then it will be more like a stew.
Easy Venison Sauté
By Linda Dightmon
- Venison steaks or pieces, not too thick. (about ¼”)
- Olive Oil
- Fresh garlic
- Sliced mushrooms
- Seasoned salt
- Pepper
- 1 Tablespoon of butter
The secret to cooking any type of game meat is to keep it moist. Game has virtually no fat. Put the venison in a shallow container for marinating. Rub both sides of the venison pieces with the fresh garlic. Then generously sprinkle seasoned salt and pepper on both sides of the meat and coat with the olive oil. Set aside.
Sauté mushroom slices in the butter and a little more olive oil. I usually add a little more garlic at this point but you may not like that much. When the mushrooms are done add the venison to the hot pan. DO NOT OVERCOOK. Try this recipe in the morning with eggs and toast. Like my husband says, “This is so good it’ll make you slap your mama.” But don’t do that!!!
Tails With A Dark Side: The truth about whitetail – mule deer hybrids
By Jim Heffelfinger
Author of the book “Deer of the Southwest” visit his website www.deernut.com to get a copy.
The “Minotaur” of Greek mythology was a creature that was half man and half bull. Hybrids have always fascinated us throughout the history of mankind. Many of our monsters are a mixture of man and beast (Wolfman, Dracula, the Fly). Likewise, consider our heros: Spiderman, Batman, and Cat Woman. Our obsession with creatures that are half one thing and half another extends to our enjoyment of wildlife. Early naturalists often described new animals as a combination of parts from animals already known to man. The mule deer was described by John J. Audubon in 1846 as having fur like an elk but hooves like a whitetail.
Whenever hunters gather, there is always abundant talk about the types of deer from different areas: Kansas whitetails, Montana mule deer, Sitka blacktails, Key deer, Coues deer, Carmen Mountain whitetails, fat Wisconsin does, and wide South Texas giants. Despite all the differences across the country, there are actually only 2 species of deer in the U.S.: white-tailed deer (Odocoileus virginianus) and mule deer (Odocoileus hemionus). The different-looking black-tailed deer of the pacific northwest is actually a type (subspecies) of mule deer.
All native deer in North America are either mule deer or whitetails. On rare occasions, however, we hear of a deer which can not neatly be labeled as one or the other. This mysterious deer looks mostly like a mule deer but has a tail with a dark back-side like a whitetail.
Different species of animals, even closely related ones, are normally kept from breeding by being geographically isolated from one another, or by separating themselves into different types of habitat. If the animals coexist in the same habitat then they generally have different courtship and breeding behavior to prevent interbreeding.
In most areas of the West where both deer species are found, mule deer inhabit the higher mountain areas and whitetails occupy the lower valleys and river systems. This habitat preference is reversed in the southwest where Coues whitetails are found in the mountains above 4,000 feet and the desert mule deer occupy the lower-elevation valleys and foothills. Because of the interspersion of whitetail habitat (mountains) throughout mule deer habitat, the southwest has an extensive zone where the two species coexist. This results in the animals being in close proximity to one another during the breeding season. It is not uncommon to see a group containing both whitetails and mule deer in these areas of overlap.
In the case of whitetails and mule deer, courtship and breeding behavior is different enough that body language and scent cues given off by a female mule deer during rut are not “understood” by a male whitetail and vice versa. Also, in many areas where their range overlaps, the rut peaks at slightly different times for the 2 species. This system of species segregation has worked remarkably well throughout their evolutionary coexistence. However, in rare cases this system breaks down and genetic material slips across the behavioral barrier, resulting in a deer that is half whitetail and half mule deer. This hybridization between the two different deer species is extremely rare but does occur throughout the West where their ranges overlap.
These bucks show characteristics which are intermediate between mule deer and whitetails. Body size and facial features indicate a mule deer but the tail is usually dark chocolate brown or black on top and white underneath. The tail of a hybrid looks very much like a typical whitetail, but is frequently much darker. Ears are normally larger than a whitetail but smaller than a mule deer. The preorbital gland in front of the eye is also intermediate between the deep pits found in mule deer and the shallow depression of whitetails.
What about the antlers? Forget about the antlers; this is a worthless characteristic to judge whether an animal is a hybrid or not. Most documented hybrids have whitetail-like antlers but you can’t count on antlers alone. I have 3 sets of antlers in my livingroom: 2 are whitetails with forked primary tines (G2) and the third is a desert mule deer with 8 long points, all arising from the mainbeam. There is simply too much variation in antlers to serve as a reliable indicator of hybridization. The whitetails in the Carmen Mountains of northern Mexico have been shown to exhibit a high degree of forked antlers like mule deer.
The best feature to determine if a deer is a hybrid is the size of the metatarsal gland, which is located on the outside of the lower portion of the rear legs. This should not be confused with the tarsal glands on the inside of the legs. The metatarsals on mule deer sit high on the lower leg and are 3 to 6 inches long and surrounded by light brown fur. The whitetail’s metatarsals are at or below the mid-point of the lower leg, usually less than 1 inch, and surrounded by white hairs. A whitetail-mule deer hybrid has metatarsal glands that split the difference, usually measuring between 2-4 inches and encircled with white hair.
Two year-old mule deer are most frequently mistaken for hybrids. This is because of their smaller antler development and the fact that the dichotomous branching, producing the big “forks”, usually does not occur until the buck is 3 years old. Young mule deer sometimes give the appearance of a very large white-tailed deer, especially if it’s tail has a dark stripe down the back, as sometimes occurs. Mule deer in some areas, like southern California, have a dark band running down the back of their tails.
Hybrids have been reported from captive facilities as early as 1898 when a whitetail-mule deer cross was produced at the Cincinnati Zoo. Occurrences were later reported from the Zoo in Minot, ND, deer pens in Alberta, and others. Researchers in Tennessee also successfully produced whitetail-blacktail hybrids in a captive situation.
In the 1930s, biologists in Arizona produced hybrids by mating mule deer males to whitetail females and also whitetail males to mule deer females. These matings resulted in 9 hybrid fawns, of which only 4 survived the first few months. The research ended abruptly and the deer had to be released before any meaningful data could be collected. In the 1970s, Gerald Day also produced hybrids in captivity in Arizona. Ten hybrids were born but only 4 lived past 6 months of age. Survival appears to be very low in hybrids even when pampered in a captive facility.

Coues whitetail x desert mule deer hybrid (F1) produced in captivity by Gerald Day in the early 1970s. Note the whitetail-like antlers and tail, but intermediate metatarsal gland on the outside of the lower rear legs. Photo by Gerald Day.
Survival in the wild is even more difficult when food doesn’t come from a feed trough and there’s no fence between them and animals with sharp teeth. To complicate matters, hybrids inherit predator avoidance strategies from both types of parents; the problem is, whitetail and mule deer have drastically different techniques for escaping predators.
The whitetail’s key to escaping is speed. They put their head down, follow established trails, and try to put as much distance between themselves and the predator as possible, as fast as possible. Mule deer, on the other hand, have developed a pogostick-like bounding called “stotting”, where all four hooves hit the ground at the same time. This strategy developed in mule deer because they evolved in wide open and rugged country throughout the West. Their escape by stotting is not as fast as the whitetail’s, but in rugged terrain it is effective for putting obstacles between the predator and the deer. Mule deer can bound over boulders and stumps that the predator must run around.
Research by Susan Lingle using captive animals in Alberta, has shown that stotting is so specialized that only deer that are 100% mule deer can do it. Even a 1/8 whitetail X 7/8 mule deer fails miserably. The hybrid’s escape behavior is chaotic; the deer will typically approach the threat and jump around in confusion. Such behavior is not conducive to passing their genes on to another generation.
Whitetail-mule deer hybrids have also been reported in the wild from Alberta, British Columbia, Nebraska, Kansas, Colorado, Washington, Texas, and Arizona.
Biologists have documented the presence of hybrids in the wild on only a few occasions. The relative scarcity of confirmed hybrids among the hundreds of thousands of deer that have been seen throughout the area of range overlap illustrates how rare they are. Every year numerous reports are received of “hybrid” deer from hunters. Arizona researcher, Gerald Day (who produced captive hybrids) investigated over 200 reports of “hybrids” and did not find a single legitimate whitetail-mule deer hybrid. Most of these hybrid reports come from hunters who have a whitetail tag on the leg of a mule deer and are trying to convince the Game Warden that they are at least half right.
Recent advances in DNA analysis technology has allowed us to look at more definitive things than ears and antlers. The production of proteins in the body is regulated by genes so by analyzing differences between some proteins, researchers can identify what species a sample of tissue came from. Serum albumin is a protein that has proven particularly useful. Analyzing this protein with a process called electrophoresis produces a series of horizontal bands on a gel surface. This protein produces a band in a different location for whitetails and mule deer. When a hybrid is tested, both the whitetail and the mule deer bands are present. The same result can be had by mixing whitetail burger with mule deer burger and running the test on the mixture. There seems to be some exceptions to the unique banding patterns but this test is at least 95% accurate.
In west Texas, managers have reported an increasing trend in the number of hybrids they see on their ranches. In the early 1980s, whitetails and mule deer in a 5-county area were tested using serum albumin and researchers found that on the average 5.6% of the deer they tested were hybrids. Individual ranches ranged from 0% to 24%!
At the same time, other researchers were busy analyzing the genetics of whitetails and mule deer on a ranch in west Texas with a different method. This method looks at mitochondrial DNA (mtDNA), which is a type of DNA that every animal inherits from only its mother. This is useful because a hybrid that has a whitetail mother and mule deer father, will have only whitetail mtDNA (the rest of the DNA will be from both mother and father). If the hybrid was a female, it would continue to pass whitetail mtDNA through it’s daughters and their daughters even if bred by mule deer bucks. After a few generations, the results of these matings would look like mule deer but would have pure whitetail mtDNA from their mother and grandmother.
And that’s apparently what happened; these researchers found that the mule deer on the ranch had mtDNA that was indistinguishable from the whitetails on the ranch. They concluded hybridization was common on this ranch. Even more surprising, a different type of analysis showed that the mtDNA of mule deer on this ranch was more closely related to whitetails from South Carolina than to blacktails (a type of mule deer) from northern California! This relationship indicated, that hybridization must have occurred between mule deer bucks and whitetail does because the whitetail mtDNA they carried was inherited from their mothers.
These findings run contrary to the conventional theory that most hybridization occurs between a whitetail buck and mule deer doe. This theory is based on the different breeding strategies of the two species. The whitetail buck is accustomed to chasing a whitetail doe relentlessly until she allows him to breed. The mule deer breeding behavior is much more relaxed with the doe only moving a few steps if she is not ready. A whitetail doe would run far away from a pursuing mule deer buck, confusing him; but a mule deer doe would not run far from a whitetail buck in pursuit. It seems more likely then, that a persistent whitetail buck would be more likely to breed with a mule deer doe.
Another researcher in Montana used both of these methods (Albumin and mtDNA) to determine the extent of hybridization and found very little, if any, had occurred in that state. Interestingly, like the west Texas study, whitetails and mule deer were found to be more closely related to each other than blacktails and mule deer which are the same species (different subspecies).
This relatively close relationship between whitetail and mule deer and their genetic differences from blacktails has spawned a new theory that the mule deer itself is actually a hybrid form; the result of a mixing of genes from coastal blacktail bucks mating with whitetails does when the glaciers of the last Ice Age receded, bringing the two species together. The resulting offspring then changed drastically over the last 10,000 years in response to environmental conditions. This would explain the similarities between whitetail and mule deer mtDNA. Analysis of the rest of the DNA (nuclear DNA) with Polymerase Chain Reaction-based microsatellites or any of the other rapidly developing techniques will add much to our knowledge of the origin of deer.
This theory is interesting since black-tailed deer actually look like a cross between a whitetail and a mule deer. This observation is not solely mine, nor is it new. Early explorers, Lewis and Clark noted in their journal “the black-tailed fallow deer are peculiar to this coast and are a distinct species, partaking equally of the qualities of the mule deer and the common deer [whitetail]”. In 1939, famous outdoor writer, Jack O’Conner also remarked that a whitetail-mule deer hybrid “more nearly resembles the Columbian blacktail than it does either of its parents.”
Regardless of the origin and evolution of our deer species, whitetail and mule deer hybrids do occur. However, they are extremely rare in the wild and almost impossible to accurately identify on the hoof because of the large variation in characteristics in each species. Some whitetails have characteristics (tails, forehead) which look like mulies and some mule deer may have whitetail-like features (no antler forks, black line on the back of the tail). Hybrids can not be identified with certainty at a distance, and it is highly unlikely that a hunter will see a hybrid while afield. The low number of interspecies matings and the low survival of hybrid offspring reduce the chance of encountering one in the wild to near zero.

This buck was taken by Jason Montagna and confirmed as a hybrid by genetic testing in 2007. He was over 6 yrs old. Weighed over 250 lbs, and was taken in November 2007 in Unit 34b, Arizona.
Arizona’s Predator Problem
by Jim Heffelfinger, Wildlife Biologist
Note: This article was first published in the Winter 1999 issue of Mule Deer magazine. People interested in reading more about southwestern deer should look for Jim’s upcoming book “Deer of the Southwest” due out in Spring of 2004.
Arizona deer hunters in the 1950s and early 1960s lived in what is commonly referred to as “the good old days.” Those who hunted at this time speak of deer behind every bush. Like all good things, this didn’t last; which is fortunate because deer habitat suffered in areas where deer populations were at destructively high levels. Arizona’s deer population declined in the late 1960s and early 1970s, which caused widespread concern among deer hunters. Deer populations recovered early in the 1980s only to again decline in the late 1980s to the present. White-tailed deer have weathered this last deer decline better than mule deer, which are now at their lowest level since the beginning of the deer permit system (1972).
Time and again, deer research conducted in Arizona has found that habitat conditions are what primarily drive deer populations up and down, with other factors like overgrazing, habitat changes, predation, poaching, and human encroachment playing secondary roles. The helplessness of this reality is very unsatisfying for those of us who want to “do something.” Like the last mule deer decline in the 1960s and early 1970s, the current decline has brought to the forefront a discussion of predators and their contribution to deer population dynamics.
When deer populations decline, predators become a focus of discussion because they clearly kill a considerable number of deer. In Arizona, mountain lions are the only consistent predators of adult deer, but coyotes and bobcats efficiently predate young fawns. There are 3 separate parts to the predator discussion: 1) do predators affect deer populations? 2) can we do anything about it? and 3) should we do anything about it? These 3 related, but distinctly different, questions are frequently asked as one — What are you going to do about the predator problem?
Do predators affect deer populations?
Predators eat a lot of deer; how can they not affect deer populations? Multiplying a statewide lion population estimate by the number of deer eaten annually by a single lion can be an alarming exercise. However, deer populations in Arizona fluctuate primarily in response to the condition of the habitat. Lion populations are controlled in a more sluggish way by prey (deer) densities and social interactions between other individual lions. Coyotes do not eat deer fawns year-round, so their populations vary in response to the density of other prey and food items, which are related to habitat conditions. Each predator/prey system is different; add an additional predator or prey species and you may have a completely different situation. Unfortunately, short-term predator studies provide only a quick snapshot of long-term relationships. The effects of lion predation in the same area may react differently from one decade to the next because of differing characteristics of the other predator populations, prey populations, and habitat conditions. This diversity of predator/prey relationships results in a myriad of information and opinions that fuel incredibly confusing discussions among biologists, hunters, and interested public.
Charles Elton did a great job expressing this complexity in his 1927 text book, Animal Ecology and Evolution:
“The balance of nature does not exist, and perhaps has never existed. The numbers of wild animals are constantly varying to a greater or lesser extent, and the variations are usually irregular in period and always irregular in amplitude. Each variation in the numbers of the species causes direct and indirect repercussions on the numbers of the others, and since many of the latter are themselves independently varying in numbers, the resultant confusion is remarkable.”
Getting to the point: do predators affect deer populations? The only truthful and honest answer is, “you bet they do.” How many deer we have depends on an interrelationship of many different factors which remove deer and affect the addition of deer to the population. Predators are one of the things that remove deer, but affecting deer populations is often confused with regulating them. Predators have been shown to accelerate deer declines caused by poor habitat quality and delay the recovery of deer populations after a decline. However, predators do not cause declines in deer populations or prevent their recovery; predation is not an over-riding deer population driver.
Harley Shaw, for example, studied mountain lions in central Arizona in the early 1970s during the depths of the last mule deer decline. He concluded that, at a reduced deer density, lions were a major source of mortality contributing to the low deer population, but that level of lion predation alone would not prevent the population from increasing.
Recently, several excellent long-term research projects have illuminated the relationships of lions and mule deer on both sides of Arizona. In California, researchers tracked deer populations for some 14 years and lion populations for 8 years. During that time, the deer population declined from a high of 5,500 in 1984 to fewer than 1,000 in 1990, presumably because of below average rainfall. The lion population also declined in response to the declining prey base, but the low point of the lion population was not reached until 4 years after the deer population “bottomed out.” During this lag time, lions may have exerted proportionately greater pressure on the remaining deer. Lion predation was the major cause of mortality, seriously impacted the deer herd. However, forage availability and quality subsequently improved with several years of normal rainfall and fewer deer on the range, and the deer population rebounded to about 2,100 in 1997.
In a long-term New Mexico study, lion predation did not impact a deer population that was stable or increasing during years of adequate rainfall. However, when the study area was hit with a multi-year drought, recruitment declined drastically and lion predation became the major cause of mortality for mule deer and accelerated a decline.
Can we do anything about it?
Whether predators affect deer populations is actually secondary to the question of whether we can do anything about it. Research in Arizona and Utah showed that when a lion was removed, the vacant territory was filled very quickly by other lions. Several mountain lion researchers have even theorized that a light to moderate removal of lions may actuallyincrease the density of lions in an area. Our knowledge of lion behavior and movements indicates that removing adult lions with large territories may result in more younger lions with smaller territories, as younger animals appear to be more tolerant of each other.
Coyotes are extremely resistant and resilient to population reduction. Computer modeling shows that they can sustain annual losses of anything less than 75% and maintain a long-term stable population by increasing their reproductive rate and moving in from surrounding areas. Clearly, removing predators from an area is not the same as reducing the predator population.
Deer populations generally peaked in the 1950s and declined in the 1960s. Predicides, such as 1080, were used extensively to control coyotes from 1947 to 1971. This is frequently used as evidence that deer populations are a function of predator populations; despite the fact that the deer decline started well before the use of poisons was curtailed. Moreover, deer populations recovered a few years later when climatic conditions improved again and went on to peak in the 1980s without the use of poisons. The use of poisons undoubtedly decreased predator populations in some areas, but it does not explain the statewide peak in deer numbers. Not so coincidentally, 1983 and 1984 were the 2nd and 3rd highest summer rainfall years on record, with the winters of 1982-83 and 1984-85 about 50% above normal.
The high deer populations of the 1980s are sometimes explained by the high fur prices at that time, causing more interest in harvesting predators. The harvest of predators and furbearers did increase significantly during that time, but how much that higher level of harvest contributed to the increasing deer populations is far from clear. Based on past deer research and management, it is much more likely that the series of very wet years during that time was the main factor driving the deer populations upward. Given what we know about the response in predator reproductive rates, it is unlikely this level of trapping (which occurs primarily in winter) significantly reduced the number of coyotes and bobcats at the time of the fawn drop (late summer, after the pups/kittens are born).
How has the statewide ban on leghold traps, initiated in 1993, affected predator populations? The number of predators taken in traps has declined precipitously, but hunt questionnaire data show that overall harvest (traps and hunter harvest) for coyotes, bobcats, and foxes has risen substantially. The total coyote harvest increased from 20,671 in 1992 (before the trapping ban) to levels ranging from 22,000 to 37,000 in the last 5 years since the ban. Many more coyotes are now being harvested annually than before the trapping ban, also, the deer decline started in the late 1980s. Thus, the lack of trapping does not appear to account for the most recent deer decline.
A 600-acre predator exclosure was established on the 3-Bar Wildlife Area as part of research to determine the causes of fawn mortality in mule deer. It was found that the survival of fawns was significantly higher inside the exclosure, where the deer were protected from predators. The protected deer population increased until it was over carrying capacity and started impacting the food available; at that point fawn survival decreased because of nutritional stress. Even though predators were responsible for a significant loss of fawns outside the exclosure, that part of the deer herd still increased by almost 40% from 1971 to 1976, illustrating the predators’ inability to keep deer populations from recovering when habitat conditions are favorable.
The Kaibab Plateau, rightly or wrongly, has always served as a predator-prey laboratory. An intensive predator control program implemented during 1905-31 resulted in 781 lions, 4,849 coyotes, 30 wolves, and 554 bobcats being removed. During these years, the deer population increased dramatically, peaking in 1928 before crashing to a level below the original population due to intensive overuse of forage and destruction of habitat. Concurrent with this removal of predators, however, was above average precipitation, a ban on doe hunts, and a dramatic reduction in livestock. There were reportedly 20,000 cattle and 200,000 sheep grazing the Kaibab deer habitat in 1889; by 1924, grazing pressure had been reduced to 4,000 cattle and 3,500 sheep. Massive predator control during this period undoubtedly contributed to this increase in the deer population, but it is difficult to separate the effects of decreased predation from the other changes occurring at that time.
Another intensive control effort on the North Kaibab took place in the 1950s using poisons to target coyotes. Another increase in the Kaibab deer population followed, until the deer herd was again destructively high and damaging important forage plants. Aldo Leopold, the father of modern wildlife management, once wrote regarding the Kaibab:
“A buck pulled down by a predator will be replaced in 3 years, deer habitat destroyed by too many deer may fail to replace itself in as many decades”.
Concerns over the effects of lion predation on the Kaibab herd following the last mule deer decline spurned a joint deer-lion study there in the late 1970s. Using radio-collars on both deer and lions, researchers documented a large decline in lion numbers on the Kaibab. Again, the deer population subsequently increased, although again it was during a wet period with abundant forage growth and following a reduction in livestock numbers. Deer populations throughout the state were also increasing in response to habitat improvement.
As part of a 15-year study in Utah, researchers reduced the mountain lion population by at least 50% yet saw no measurable difference in mule deer numbers nor the proportion of deer killed by lions. They concluded that the lion control made only a trivial contribution to the number of deer available to harvest during the hunting season.
Intensive coyote removal (usually with poisons) can increase deer populations if climatic conditions are good; data on the removal of lions is less compelling and depends on the intensity of removal. When a deer population is as high as the habitat can support, there is no room for more deer. In this case, any deer saved from predation is going to die from another mortality factor or cause the deer population to exceed the carrying capacity of the habitat — to the detriment of deer, habitat, and all deer enthusiasts. If a deer population is below carrying capacity, well-timed, intensive predator management may moderate a deer decline, accelerate a recovery, or even increase a population. The problem lies in effecting a significant reduction (in both intensity and area) in predator numbers using the methods currently available. Traps are no longer legal on public land, predicides are not registered for use anywhere, aerial gunning is not practical in much of the state’s brushy or forested mule deer habitat, and many areas are not suitable to predator hunting because of rough and remote terrain. More problematic is the uncertainty of future climatic conditions; are we increasing the deer populations at a time when the next few years will be dry and unable to support the increased number of deer?
Should we do anything about it?
We manage prey species, why don’t we manage predator species? In the early days of game management, predators were not managed — they were persecuted. Like the medical profession, the wildlife profession has learned a lot since those early days of bloodletting. Some say the lesson has been too deeply ingrained and predators have been placed on a pedestal as untouchable. Many people still recall the mass slaughters of yesteryear when the topic of predator management surfaces, and do not realize how common and prolific predators are.
The California Department of Fish and Game lost its ability to manage lions in 1971 as a result of public referendum. Ironically, so many problem lions are now killed by department personnel (at public expense), that the total annual lion removal is greater than when they were legally taken by hunters. Several years ago Alaska had researched-based information indicating that predator management could increase moose and caribou populations, yet a public outcry brought their plans to a screeching halt.
Some people claim that wildlife management agencies don’t want to admit there is a predator problem because predator management is not politically correct in today’s environment. Any agency that ignores the potential social implications of a predator management program stands to lose not only credibility with the public but the ability to maintain management authority over predatory species. There is a place for short-term predator management in cases of small, isolated populations which have been fragmented by human activities, such as pronghorn populations. However, predator management for the purpose of increasing deer populations over a large area in the long-term is not feasible. Localized programs do not make a difference from a statewide perspective and spend funds that could be better used for habitat projects.
The Utah study mentioned earlier showed that a 50% reduction in the lion population did not increase the deer population. A greater reduction in the lion population would be very difficult to achieve. If the deer population is not below the carrying capacity of the habitat, there is no room for more deer. This is also illustrated by the New Mexico lion study, where a reduction of more than 50% in the lion population was followed by a severe drought; the mule deer fawn recruitment and adult survival decreased drastically because of the reduced habitat carrying capacity. If lion population reduction were done in either of these cases for the purpose of deer management, it would not have been money well spent. The annual fluctuations of deer habitat carrying capacity in the Southwest add to the difficulty of prescribing predator management.
Predator-prey relationships are complicated and must be discussed on a case by case basis; sweeping generalizations about predation are guaranteed to be false in some areas at some times. Deer populations dynamics are not simply a matter of one factor determining how many deer we have, but instead are governed by an extremely complex interrelationship of many factors. Deer hunters and biologists must look realistically at the biological, logistical, and sociological issues surrounding predator management and consider, for each case, whether it is an effective, feasible, or intelligent way to manage deer populations.
West Nile Virus Information
Background
What is West Nile virus?
West Nile virus is an arbovirus (short for arthropod-borne virus) that causes encephalitis (inflammation of the brain). Blood-feeding insects such as mosquitoes transmit arboviruses, including West Nile virus. Most infections with West Nile virus have been identified in wild birds, but the virus can also infect humans, horses, dogs, cats, bats, chipmunks, skunks, squirrels, domestic rabbits, and domestic birds.
Where did West Nile virus come from?
West Nile virus was first identified in the West Nile district of Uganda in 1937, and has since been found in Africa, Eastern Europe, West Asia, the Middle East, and the United States. The strain of virus found in the United States most closely resembles that found in the Mediterranean and Middle East.
How is West Nile virus transmitted?
Mosquitoes draw the virus from infected birds and transmit it to animals and humans through bites. West Nile viral encephalitis develops in animals and humans when the virus multiplies and crosses the blood-brain barrier. West Nile virus is not transmitted directly from person to person, animal to person, person to animal, or animal-to-animal. Ticks infected with the virus have been found in Asia and Africa; however, there are no verified reports of ticks spreading the virus and their role in transmission has not been determined.
What clinical signs are associated with West Nile virus infection?
Horses – The most common sign is weakness, usually in the hindquarters. Weakness may be indicated by a widened stance, stumbling, leaning to one side, and toe dragging. In extreme cases, paralysis may follow. Fever is sometimes evident, as are depression and fearfulness. Approximately 40% of cases of West Nile encephalitis in horses proved fatal during the 1999 outbreak.
Humans – Most infections in humans are relatively mild, with flu-like symptoms including fever, headache, body aches and, in some cases, skin rash and swollen lymph glands. Signs of more severe infections include high fever, neck stiffness, muscle weakness, convulsions, and paralysis. Death rates associated with severe infection range from 3% to 15% and are highest among the elderly.
Other animals – Wild birds infected with West Nile virus in the United States are most often found dead; therefore, descriptions of clinical signs in wild birds are not readily available. Nor have clinical signs associated with West Nile virus infection in dogs, cats, bats, chipmunks, skunks, squirrels, domestic rabbits, and domestic birds been well described. It appears that, although they may be infected, many of these latter species may not develop clinical signs of disease.
How is West Nile viral encephalitis diagnosed and treated?
Diagnosis of West Nile viral encephalitis is based on a history of exposure, clinical signs, and results of diagnostic blood tests.
As for all viral diseases, treatment consists of providing support (e.g., hospitalization, intravenous fluids, respiratory support, prevention of secondary infections, and good nursing care) while the affected individual’s immune system responds to the infection.
Can you get West Nile virus directly from birds?
There is no evidence that a person can get the virus from handling live or dead infected birds. However, persons should avoid barehanded contact when handling any dead animals and use gloves or double plastic bags to place the carcass in a garbage can.
How many types of animals have been found to be infected with West Nile virus?
Although the vast majority of infections have been identified in birds, West Nile virus has been shown to infect horses, cats, bats, chipmunks, skunks, squirrels, and domestic rabbits.
What is the incubation period in humans (i.e., time from infection to onset of disease symptoms) for West Nile encephalitis?
Usually 3 to 14 days.
Prevention
Can West Nile viral encephalitis be prevented?
A vaccine is now available for horses. For other species, limiting exposure to mosquitoes is considered effective prevention. The following actions may reduce the risk of mosquito bites and possible exposure to West Nile virus.
- Check the integrity of screens around your home, porch, and patio.
- During warm months, avoid outdoor activities at dusk and dawn.
- If you must be outdoors during hours when mosquitoes are most active, cover up with shoes, socks, long pants and long-sleeved shirts.
- Use mosquito repellant on exposed skin and spray clothing with repellents containing permethrin or 35% DEET (N,N-diethyl-meta-toluamide) since mosquitoes may bite through thin clothing. When using insecticides or insect repellants, be sure to read and following the manufacturer’s directions for use.
- Eliminate stagnant water from any receptacles in which mosquitoes might breed.
Is DEET safe?
Yes, products containing DEET are very safe when used according to the directions. Because DEET is so widely used, a great deal of testing has been done. When manufacturers seek registration with the U.S. Environmental Protection Agency (EPA) for products such as DEET, laboratory testing regarding both short-term and long-term health effects must be carried out. Over the long history of DEET use, very few confirmed incidents of toxic reactions to DEET have occurred when the product is used properly.
Is there a vaccine against West Nile encephalitis?
No, but several companies are working towards developing a vaccine.
Risk To Humans
Are game hunters at risk for West Nile virus infection?
Because of their outdoor exposure, game hunters may be at risk if they become bitten by mosquitoes in areas with West Nile virus activity. The extent to which West Nile virus may be present in wild game is unknown. It appears that birds often die within 48 hours of exposure so birds that are acting normally pose essentially no risk to hunters.
What should wild game hunters do to protect against West Nile virus infection?
Hunters should follow the usual precautions when handling wild animals. If they anticipate being exposed to mosquitoes, they should apply insect repellents to clothing and skin, according to label instructions, to prevent mosquito bites. Hunters should wear gloves when handling and cleaning animals to prevent blood exposure to bare hands and meat should be cooked thoroughly.
Who is at risk for getting West Nile encephalitis?
All residents of areas where virus activity has been identified are at risk of getting West Nile encephalitis; persons over 50 years of age have the highest risk of severe disease. It is unknown if immunocompromised persons are at increased risk for West Nile virus disease.
Additional Information
Arizona Department of Health Services 24 Hour phone line:
Phoenix Area – 602-364-4500
Elsewhere in Arizona – 800-314-9243
Informational web sites:
Center for Disease Control (CDC) – www.cdc.gov
American Veterinary Medial Association (AVMA) – www.avma.org
Arizona Department of Health Services (ADHS) – www.hs.state.az.us
What You Should Know About West Nile Virus Brochure (PDF, 800 kb)
[highlight1 variation=”orange” textColor=”#191919″]Attention Hunters: Doves Do Not Transmit West Nile Virus[/highlight1]
West Nile Virus (WNV) is a mosquito-borne virus that was first detected in the United States in 1999. The majority of people and animals that are infected with WNV have no symptoms or only a mild illness, such as a fever or headache. The Arizona Game and Fish Department has put this information sheet together to inform and educate dove hunters about WNV. All information contained on this sheet was taken from the Arizona Department of Health Services – West Nile Virus Fact Sheet. Here are some facts to keep in mind as you go out into the field:
- People become infected with WNV only from the bite of an infected mosquito. Birds (including doves) and other animals CANNOT transmit WNV to people.
- WNV is not spread by direct person-to-person or person-to-animal contact. To be fully safe, wear protective gloves when handling or cleaning your dove.
- The most severe illnesses have been seen in crows, jays, ravens and horses, NOT doves.
- Avoid standing water where mosquitos may be living. Avoid being bitten by mosquitos by using insect repellent (35% DEET) and/or wearing lightweight clothing that covers the arms and legs.
- Proper cooking kills the WNV. Consequently, there is no danger associated with eating birds that have been properly cooked.
Other Resources
- AZ Daily Star article about WNV in AZ
- National Biological Information Infrastruture link for WNV info
- AZ Public Health Serivce info
- USGS maps of WNV in the US
Diseases of Coues Deer
CWD is currently NOT known to be present in Arizona. CWD has been documented in New Mexico (click here to read about CWD in New Mexico).
Here are some links to information about other diseases (not necessarily found in Coues deer, but might be of interest to hunters):
Read the article below to learn more about protecting yourself from CWD.
[highlight1 variation=”red”]Hunters Advised to Take Precautions Against Chronic Wasting Disease[/highlight1]
The Arizona Game and Fish Department is advising hunters harvesting meat from deer and elk in other states to take precautions.
Chronic wasting disease (CWD) is a fatal neurological disease that affects deer and elk. It is in a group of diseases called transmissible spongiform encephalopathies, which include bovine spongiform encephalopathy in domestic cattle (also called “mad cow disease”) and scrapie in domestic sheep and goats. Surveillance in Arizona has thus far shown that CWD is not present in our deer or elk populations, but the Game and Fish Department has implemented steps to reduce the potential for this disease so that it doesn’t establish itself in our state.
Very little is known about how the infectious agent of CWD is transmitted from one animal to another. Nonetheless, we are concerned that CWD might be inadvertently brought into our state through the transport of some infected animal tissues.
In 2002, a ban on the import of live cervids (see notice below) – hoofed mammals like deer and elk – was implemented. Now there are some more practical suggestions that may help prevent the spread of CWD. Precautions that should be taken before bringing any harvested animal back into Arizona include:
- Bone out the meat and package (either commercially or privately); do not cut into the spinal cord or remove the head; do not quarter (or other method) the carcass with any of the spinal column or head attached.
- Do not bring the brain, intact skull, or spinal cord back into Arizona.
- If you wish to take the antlers attached to the skull plate, thoroughly scrape and clean tissue from the skull plate using a knife or brush and bleach.
- Thoroughly clean all utensils afterwards with bleach.
- Animal skins or capes (without skull) do not need any further treatment.
- Sawn-off antlers – with or without velvet – do not need further treatment.
- Upper canine teeth of elk (“ivories”) do not need further treatment.
- Finished, taxidermied heads do not require further treatment.
In addition, you may want to have your deer/elk tested for CWD if such a service is available in the state in which you harvested the animal. There may be a fee for such CWD examination. Contact that state’s Fish and Game Department for information on their policies and needs.
At this point, there is no evidence that humans or animals other than deer and elk can get CWD, however, we are asking hunters to take the above precautions in order to protect Arizona’s deer and elk herds from the disease.
In addition, the Department is asking for your assistance in detecting animals that may become infected with this neurological disease in the future. If you ever note deer or elk that are in poor condition, losing hair, droopy ears, stumbling, or have a slow reaction to your presence, please contact the Department at 1-800-352-0700.
Additional information about chronic wasting disease is available from: Chronic Wasting Disease Alliance – www.cwd-info.org
Aging Coues
All wild ungulates (deer, elk, pronghorn, bighorn sheep, etc.), can be aged fairly accurately by examining their teeth. This can be done two ways. One way is to examine the teeth under a microscope and the other is to look at wear and replacement patterns of all the teeth in the lower jaw. Using the number of tines on a buck’s antlers is not an accurate way to estimate age. Bucks in exceptional condition can have more tines than those of the same age which are in poor condition. And older bucks may have heavy beams but fewer points than a young buck.
Aging by counting cementum annuli under a microscope
This method requires the extraction of one of the large front incisors from the lower jaw and slicing the root extremely thin. These slices are then stained and examined under a microscope. As a wildlife biologist, I have pulled and collected hundreds, if not thousands of teeth from ungulates. Most of the time biologists send those teeth to a lab either at their Game and Fish Department or to one in Montana (Matson’s) to be examined. But I have also had jobs where I spent hours cutting, staining and examining slices of deer teeth. This method is very interesting and is similar to counting annual rings in a cut tree trunk. Deer lay down a layer of cementum in their teeth each year. A specialized machine is used to slice microscopic sections off of the tooth root. After staining, the slices of tooth will show annual rings.
Counting cementum annuli is the most accurate method of aging deer older than 3.5 years. In some species you can gain additional information from this technique. Matson’s lab in Montana has correlated the years that a bear has young with thin layers of cementum (perhaps because the bear is putting more resources into the pregnancy). So by looking at a slice of tooth from a female black bear, a biologist can tell how many times the bear has produced young. This works well in bear because they tend to only have young every other year. But for most deer, reproduction is an annual event.
If you have a buck that you would like aged, pull the front incisors from the lower jaw (deer don’t have upper incisors) and contact Matson’s lab for information on how to get it aged. It is just as expensive for the lab to analyze one tooth as it is for 4-5, so you might wait until you have several or get your hunting buddies to collect teeth too.
Make sure when you extract the tooth that you do not break off the root. The easiest way to extract them that I know of is to use a pocket knife to slice down deep into the gum on each side of the tooth. Then wiggle the knife on each side of the tooth so as to loosen things up. Do this on both of the front incisors. Then place the blade of the knife behind the teeth, with the width of the blade parallel to the width of the teeth. Push the knife blade into the gum and gently pry the knife toward you. This should push both teeth forward and down from the rest and then you can slice any remaining flesh from the root to fully extract them.
For more information visit Matson’s Laboratory, LLC – Home Page.
You can email Gary Matson at gjmatson AT montana DOT com
Matson’s Laboratory, LLC
8140 Flagler Road
P.O. Box 308
Milltown MT 59851
Aging by tooth wear and replacement
Another way to use a deer’s teeth to determine it’s age is by looking at wear and replacement. Deer develop their teeth in a predictable pattern. In addition, over time, the teeth are ground down and that wear can give an indication of age. This method is most accurate for deer less than 3.5 years old. For older deer, the amount that the teeth wear down annually varies according to what they are eating. A deer that lives in an environment with a lot of sandy, gritty soil will wear his teeth down faster than one that doesn’t. Many Game and Fish offices have a “deer jaw board” which has examples of deer jaws of known age deer so that one can see how the teeth wear in that particular area. When I get some photos of some jaws, I will post them. An excellent reference for aging all big game animals in Arizona has been published by the Arizona Game and Fish Department. It gives a great description and has pictures demonstrating the tooth replacement patterns.

Click on the image to go directly to the Arizona Game and Fish Department web site. I don’t see this guide listed for purchase at the web site, but you can call the Dept. at (602) 942-3000 to ask where you can purchase a copy. I believe it is only $3.
To use this method of aging a deer, you want to look at the lower jaw. A deer has long incisors on the front part of the jaw and premolars and molars on the back the jaw. In fawns, you will only see four back teeth (3 premolars and 1 molar). A yearling Coues deer will have 3 premolars and the third premolar will have three cusps. The molars of a yearling are still coming in, but you should see three molars with the last molar only partially erupted. A deer that is 2.5 years old will have all its adult teeth in and the third premolar will only have two cusps. There is very little wear evident on the teeth of a 2.5 yr old. Because a deer does not replace any of its teeth after 2.5 years, the teeth start to show more wear with each passing year. The first molar (the fourth tooth on the back part of the jaw) is the one that will show the most wear and is the one to key in on. Look for the width of the dentine (brown parts of top of tooth) compared to the width of the enamel (white part on top of tooth). As the tooth wears it will have wider dentine sections compared to the enamel. And the cusps of the teeth will wear down and become smooth. A deer that is 3-5 years old will still have some cusps to it on the first molar, whereas on an older deer that molar will be very smooth. Here is a link to an online site that shows pictures of this wear pattern. For Arizona specific information, you will want to purchase a copy of the publication put out by Arizona Game and Fish – its only $3 and well worth it.
Coues Deer Sign
Deer leave a variety of sign that can let you know where they have been even if you don’t see them. The most obvious of signs are scat (feces) and tracks. Coues deer scat is in the form of small pellets. The pellets will vary in color from greenish (when really fresh) to brown or black and even gray or white (when really old). The photos below show some of the variation in colors. Coues scat can be clumpy if the deer is eating a really moist diet. Deer scat will also be moist when fresh, but dries fairly quickly. Scat that is somewhat fresh may appear dry on the outside but still be moist on the inside.
All photos by A. Moors.
Scat

Coues deer scat next to rock

There is a quarter in this photo to show scale

This photo shows older scat on the left and newer scat on the right.

Very old scat showing the whitish-gray color.
Tracks
Deer also leave tracks when they travel through an area. Good places to look for tracks include washes, hillsides, and saddles. Also check any area that has muddy soil like around a stock tank, spring or river. Looking at tracks can tell you the size of the animal and what it was doing there (i.e., running, walking, pawing at the ground). White-tailed deer and mule deer have very similar tracks, but mule deer are larger. Mule deer tracks tend to be about 2.5- 3 inches long while Coues tracks tend to be 2 to 2.5 inches long. Sometimes people confuse javelina and whitetail tracks. Javelina tracks are fairly easy to distinguish due to their smaller size (1 to 1.5 inches long) and blunter tips (see photos below).
Tracks can help determine when an animal uses an area.

This photo shows a game trail that crosses a dry sandy wash.
Coues Deer Habitat
The white-tailed deer is highly adaptable. It is found from Mexico and Central America to Canada and throughout the United States. It survives in environments that are subject to extremes in temperature – both heat and cold. It lives in remote areas where few humans ever go and it survives in highly populated areas as well.

Photo courtesy of Wade Sherbrooke, Southwestern Research Station, Portal, Arizona.
So what is good Coues deer habitat? When evaluating habitat, it helps to think of the elements that are needed for any animal – food, water, shelter, and space to live. Good Coues habitat is any area that provides adequate amounts of each of those factors. The best Coues habitat will provide a large diversity of foods by having a mix of open areas and brushy areas. Coues are primarily browsers, so shrubs must be available for them. However, Coues highly prefer forbs and those grow more commonly in open areas such as a grassy meadow or grassland found at the edge of juniper woodland.
Coues deer seem to be most numerous in woodland areas about 4000-6500 feet in elevation that have Madrean evergreen oaks or areas of oak mixed with juniper and pinon pine. However, Coues deer can be found in the more open Sonoran Desert and in Semi-Desert Grasslands. They can also be found in Ponderosa Pine forests. I have selected some photos below to show some of the variety in habitat that Coues deer will use.

The illustration above shows the distribution of Coues deer in Arizona. Those occupied areas tend to be within the 4000-6500 ft. range in elevation. Illustration by Bill Quimby. For a detailed map of the density of Coues deer in Arizona, check out the “Where to Hunt” section. Coues deer are also found in Mexico and southwestern New Mexico.
The best Coues habitat will have several permanent water sources since these deer need them to survive. The home range of a Coues is about 1-2 square miles. Deer density is highest within 0.5 – 1 mile of a good water source. Maghini and Smith (1990) suggested that a density of 1 water source for every square kilometer (approx. 0.5 sq. miles) is best for female Coues. Based on their research in the Santa Ritas in Arizona, Ockenfels et al. (1991) suggested that a density of one water source every 2-3 sq. km would meet deer requirements. They also found that the first 400 m (roughly equal to a quarter mile) around a water source was used far more often than areas greater than 1200 m away from water.
If you are looking for an area that has a high density of Coues deer, look for a place that has a good mix of thick and open vegetation types between 4000-6500 feet in elevation and that has springs or water tanks scattered throughout the landscape within about a 1/2 to 1 mile of each other.


Juniper-oak woodlands with large populations of Coues deer. These two areas have a good mix of white and Emory oak, mesquite, acacia and pinon pine along with the juniper. The variety of topography in these areas provides places for many different types of plants to grow (trees, browse, grass and forbs). This excellent diversity of plants along with good water sources makes these places great habitat for Coues. Deer will feed through the open areas in early morning and evening and move into the thicker areas to bed.

Coues will also use more open habitat of mesquite and prickly pear. There are 3 small bucks near the center of this photo. Photo by A. Moors.

Coues deer feeding between some prickly pear and agave. This deer fed on this open slope in the morning and then moved down into a drainage with thick shrubs for bedding. Coues deer will even use drier areas than this, areas with less grass and more cactus and ocotillo. Photo by A. Moors.


These brushy hillsides provide some good Coues habitat. It can be extremely difficult spotting a Coues deer in this type of habitat. Photos by A. Moors.

This area has a good mix of oak trees, juniper, shrubs and grass. Coues deer feed in the more open areas and bed in the thick vegetation lower in the canyon. Photo by A. Moors.

Ponderosa Pine forest can make good deer habitat if there is enough diversity of other species. A variety of oaks, shrubs, and forbs help make this habitat productive for Coues deer.

This photo shows an excellent interspersion of habitat types. The ponderosa pine forest in the upper left of the photo is supplemented by the brushy hillside. This kind of diversity of plants and structure is great for deer. Coues deer, like all white-tailed deer, spend a lot of time in edges where different types of habitats meet.

Coues deer are amazingly adaptable, they can occupy the ponderosa pine forest shown above or the very dry and more open habitat shown to the right.
Coues Life Stages

This graphic shows the peaks of activity for several of the life stages of Coues whitetail. Data and graphic are from the Arizona Game and Fish publication entitled "General Ecology of the Coues White-tailed Deer in the Santa Rita Mountains". Click on image to see larger view. Read the sections below for more detail about the life stages of Coues deer.
Breeding
The breeding season for the Coues deer is about 6-8 weeks later than northern or eastern whitetail. Breeding generally occurs from December to February with the peak usually in January. Some breeding activity can occur in November and some even as late as March. In November, bucks are generally found in small herds and can be seen sparring to establish dominance for the upcoming breeding season. These sparring matches are generally very short-lived and mild. They are much less dramatic than the spectacular battles that can occur during the rut. Bucks spend the breeding season searching for does in estrus (those ready to breed). Females are receptive to breeding for only 2-3 days. Females that are not bred in their first estrus cycle may be bred during their next cycle about 26 days later. Bucks can be very aggressive toward does during the breeding season. I have seen them chase a doe in a frantic effort to keep them from running away. They herd the doe much like a horse herds a calf or a sheepdog herds sheep, not allowing them to escape. If there are other bucks present around the doe, the dominant buck will usually be closest to the doe and force the other bucks to stay in the periphery. Bucks are most vulnerable to hunters during the rutting period because they are much more active throughout the day and rather careless in their single-minded pursuit of females.
Reproduction is highly influenced by the nutritional condition of bucks and does. Bucks that do not receive adequate nutrition can have delayed antler development which can lead to an extended rut period. Similarly, does in poor condition can have delayed cycles which can result in later fawning dates. Smith (1984) found that in a drought year in Arizona the average Coues fawning date was in the third week in August. Whereas in a year following several years of exceptional rainfall, the average fawning date was 2 weeks earlier. This 2 week difference in breeding activity has been documented in other whitetail subspecies for does on a nutritious diet compared to a substandard diet (Verme 1965). Smith (1984) also found that in years of poor food production, young Coues does (< 3 yrs old) may not breed at all and although the older does may still produce fawns, they have fewer of them (singles vs. twins). I have not seen any documentation in the literature that Coues deer can have triplets, but I have seen a Coues doe with three fawns in Arizona, which I presume were all her fawns. The fawns were of identical size and condition and were all following the one doe. It could be that she "adopted" a fawn from another doe that was killed, but that is probably less likely than her having had triplets. Production of triplets has been documented in other subspecies of whitetail.
Antler Cycle

Coues buck in velvet. Photo courtesy of Wade Sherbrooke, Southwestern Research Station, Portal, Arizona.
Antlers are made of the fastest growing bone in the animal kingdom. Antlers are grown and shed annually, which in itself is amazing. In addition, generally, each year a deer’s antlers will grow larger than in the previous year. The annual cycle of antler development is primarily controlled by hormones produced in the pituitary gland and testes. Increasing daylength stimulates the pituitary gland to secrete substances that cause antler growth to start. Antlers receive the nutrients needed for growth through a fur covered skin (called velvet) covering the antlers. During this velvet period, the antlers are very sensitive to damage. If a buck injures his antler during this time, it will generally cause abnormal antler growth in the form of non-typical tines or bumps. These abnormalities may continue to be seen through each subsequent year’s antlers. In addition, it has been shown that in antler producing cervids (deer, elk) that an injury to the body will sometimes cause abnormal antler growth on the opposite side. For example if an elk injures his front right leg, the antler growing on his left side may become deformed. Later, the pituitary gland also secretes gonadotropin which causes the testes to enlarge. As the testes enlarge they produce an abundance of androgen which inhibits the pituitary antler-growth hormone, resulting in the stoppage of antler growth and the drying of the velvet covering on the antler. Antlers are eventually shed as changes in hormones cause the decalcification in the pedicle (the living bony growth on the frontal bone of the skull to which the antlers are attached).
Just as the breeding season for Coues is 6-8 weeks later than that for other subspecies of whitetail, the antler cycle is similarly delayed. For Coues deer, antler growth happens from June-September. During that time, the antlers are covered with “velvet”. After the buck has completed antler growth, the velvet dries up and is rubbed off (antler polish). In Arizona, Coues deer typically polish their antlers from late September to mid-October. Originally the antlers are white but become stained brownish from blood in the velvet and from the juices in the trees and bushes that the buck rubs his antlers against. Antlers are then used during the breeding season to secure mates through displays and fighting with other bucks. After the breeding season, hormonal changes cause the antlers to drop off. In Arizona, that antler drop typically occurs in April and May. Growth of the new antler begins shortly after antler cast.

This is a picture of a mule deer buck, but I am using it to show what can happen with abnormal hormone production. Most likely his testicles were injured in some way so that he did not have the full range of hormone cycling. This buck never shed his antlers and the antlers stayed covered in velvet (velvet has been removed in photo above). The antlers grew year-round but in a very abnormal fashion. The antlers never solidified and they are very light, like balsa wood. This buck is one of the largest "cactus" bucks ever and he probably grew those antlers for 8-10 years before being shot by Ozzie Washburn in Chama, New Mexico. This buck is in the Roger Selner trophy deer collection which travels around to many of the hunting shows throughout the country. Photo by A. Moors.

This is a closeup of that buck's antlers. Photo by A. Moors.
Fawning

Coues doe and fawn. Photo courtesy of Wade Sherbrooke, Southwestern Research Station, Portal, Arizona.
Does that become pregnant will give birth to fawn(s) about 180-200 days later. Yearlings tend to give birth to single fawns while older does generally give birth to twins. Nutritional condition of the does and bucks influences by the timing of fawn drop and number of young produced (see discussion of this in the breeding section above). Most fawns are born in July and August. Fawns will weigh between 4-6 pounds at birth and nurse for two to three months. Fawns can eat some vegetation even while still dependent on the mother’s milk during the first month. In Arizona, nursing tends to occur between 0800-1000 and 1500-1800 hours. Fawns have spots on their coats for about the first two months of their lives. Fawns will stay with their mother until she drives them off, which usually happens just before she gives birth again the following year.

Coues fawn still showing spots in coat. Photo courtesy of Wade Sherbrooke, Southwestern Research Station, Portal, Arizona.
Shot Placement
Shot Placement
The information on this page is taken with permission from Craig Boddington’s excellent book “Shots at Big Game: How to shoot a rifle accurately under hunting conditions” published by Safari Press, Inc. Illustrations by Stuart Funk. Click on images to see a larger version.

Shot placement on a broadside deer is simple, but deer don’t often cooperate by standing just right. You’re more likely to get a quartering shot of some kind. On animals quartering away, try to locate the off-side front leg, and follow its line up to the chest area to find your aiming point. You need to visualize where the vitals lie from any angle, and plan your shot accordingly. On strongly quartering-away shots, your bullet may actually enter the deer’s body quite far back. On deer quartering toward you, keep your eyes on the on-shoulder; that one protects the chest area that your bullet must reach.

The problem with wind isn’t really that it has an effect — it’s in reading it and figuring just how much effect it will have. Winds at a 45-degree angle cause half the drift of a 90-degree crosswind, while headwinds and tailwinds have no effect at all. But is the wind at the target the same as where you are? How can you tell? You can read the wind carefully, but it comes down to a best guess.

It doesn’t matter whether the angle is uphill or downhill – the effect is the same. Your trajectory will essentially follow the trajectory curve of a bullet fired at the horizontal distance to your target.

Successful shooting of running game with a rifle isn’t materially different from hitting flying game with a shotgun. It’s essential that you keep the rifle barrel moving, establish your lead, swing with the target, and make certain that you fire with the barrel moving, following through afterward by continuing your swing.

Eddie’s Hunt in Unit 22
It all started when I was drawn for elk and deer for the 2001 season. Getting drawn for one is a rare but both, I couldn’t believe it. At home, I practiced raising my rifle to my shoulder, focusing through the scope, and removing the safety. I scouted the area several times prior to the December operner, as it was my first hunt in the area. My thanks go out to Del for telling me to hunt the mountain range west of SR 87 not east. The area is mountainous with a sea of Manzanita bushes that choke the mountain slopes. As I drove the roads for the first time I was intimated by the terrain. “How in the world will I be able to see such a small animal in all these bushes” I asked myself. That question was answered on the next scouting trip as I glassed the south slopes. The does I saw walking in and out of bushes were like fleas in a dog’s fir. Ultimately, I found a great looking spot (Plan A) with two tall mountains melting into each other creating the notorious escape routes (draws/canyons) that whitetail deer frequent when they sense danger. I was not able to find a buck that I wanted to hunt but I was hopeful that this spot would yield my Christmas present.
The first morning found me hunting alone and watching some does that eventually dissolved in the Manzanita bushes from only fifty yards or so. I drove to another draw further down the road, thinking I would come back to the Plan A spot for the evening hunt and find a curious buck chasing the does. As I walked down the draw I slipped and fell twice on the snow covered ground. I was mad that I dropped my rifle in the snow. My blood boiled as the snow in scope lenses only melted and smeared when I tried to clean it. I finally stopped where I could see about 75 yard in any direction. At 10:00 AM it had warmed up enough for an up thermal and a highway of deer tracks in the snow told me that this was a good ambush point. As luck would have it, I heard some noises and I took the Ruger 7mm mag off my should just in case. Just then I saw three deer walking in a single file line. The last one was a small buck that had his nose to the ground behind the does. He was probably a two year old buck, so I passed on him hoping for something a lot bigger. That evening I didn’t see anything in the Plan A spot so I headed home for hot food and a warm bed.
Saturday morning I was up at 4:00 AM and out the door at 5:00 AM (I live about an hour and a half away) and the snowstorm from the previous night brought snow as low as Sunflower. When I arrived at my hunting destination, there was snow on the north and south slopes with two sets of fresh tracks crossing the draw. I walked and glassed as I went but didn’t see a single thing all morning. At 11:00 AM or so, I decided to make my way back to the truck. As I came to the tracks again, I decided to follow them as far as I could. It wasn’t very far because of the dense vegetation, but just then a doe stood up about 40 yards. A second later a big buck erupts from the ground like a volcano as he leaps over bushes. I could see that the right side of the antlers, “He’s a 4 point” I thought in disbelief. I could only see his head and crown through the bushes until he came to a big drainage that led to the draw where he disappeared. I left the area convinced, that was the buck I was going to take if I got another chance.
The following Saturday (10-22-01) I brought my friend (she doesn’t hunt but she’s OK anyway) with me and we glassed a doe all morning hoping that a love struck buck would mistakenly declare his intentions to her. That wasn’t the case so we headed back to the truck for some lunch. On the way to the truck I decided to show her where I jumped the big buck the previous week. More savvy this time, I clinched my Ruger in my hands like a prize fighter in heavy weight boxing match as we entered the hunting arena where I was defeated exactly one week before. I pointed to my boot prints in the patches of the snow and fresh deer tracks in the soft earth. In the distance, we could hear some rustling of bushes that I dismissed as birds foraging. I refocused my interest again when the rustling turned to branches breaking. At close range, the buck jumped over a bush and I saw the same right side of the rack. “It’s him, it’s the same buck” I though I said aloud. I shouldered my rifle, located the movement in the brush through the scope and instantly removed the safety. In a fortunate twist of fate, the big buck disappeared in the same drainage in the side of the mountain, but our scent forced him up. Thanks in no small part to my friend, I saw the buck broadside at 130 yards uphill. I raised my Ruger 7mm mag again with a variable scope set at 6 power and I could only decipher the decent main beam and spread. I pulled the safety button again and I squeezed the trigger but nothing happened. I was already in fire mode from first sighting (seconds before). The training I did in the preseason kicked in and worked against me momentarily. Buck fever is a funny thing, Huh. With a quick flick of the thumb to the safety, I squeezed off the 150-grain Dove Tail Federal bullet that found its mark. He ran ten-yards and expired humanely. Two hours, some cuts, several tumbles over Manzanita bushes, and some bruises later I raised my hand in victory. Christmas came a couple days early for me this year in the form of a 3 x 4 Whitetail deer with a kicker on the brow tine.


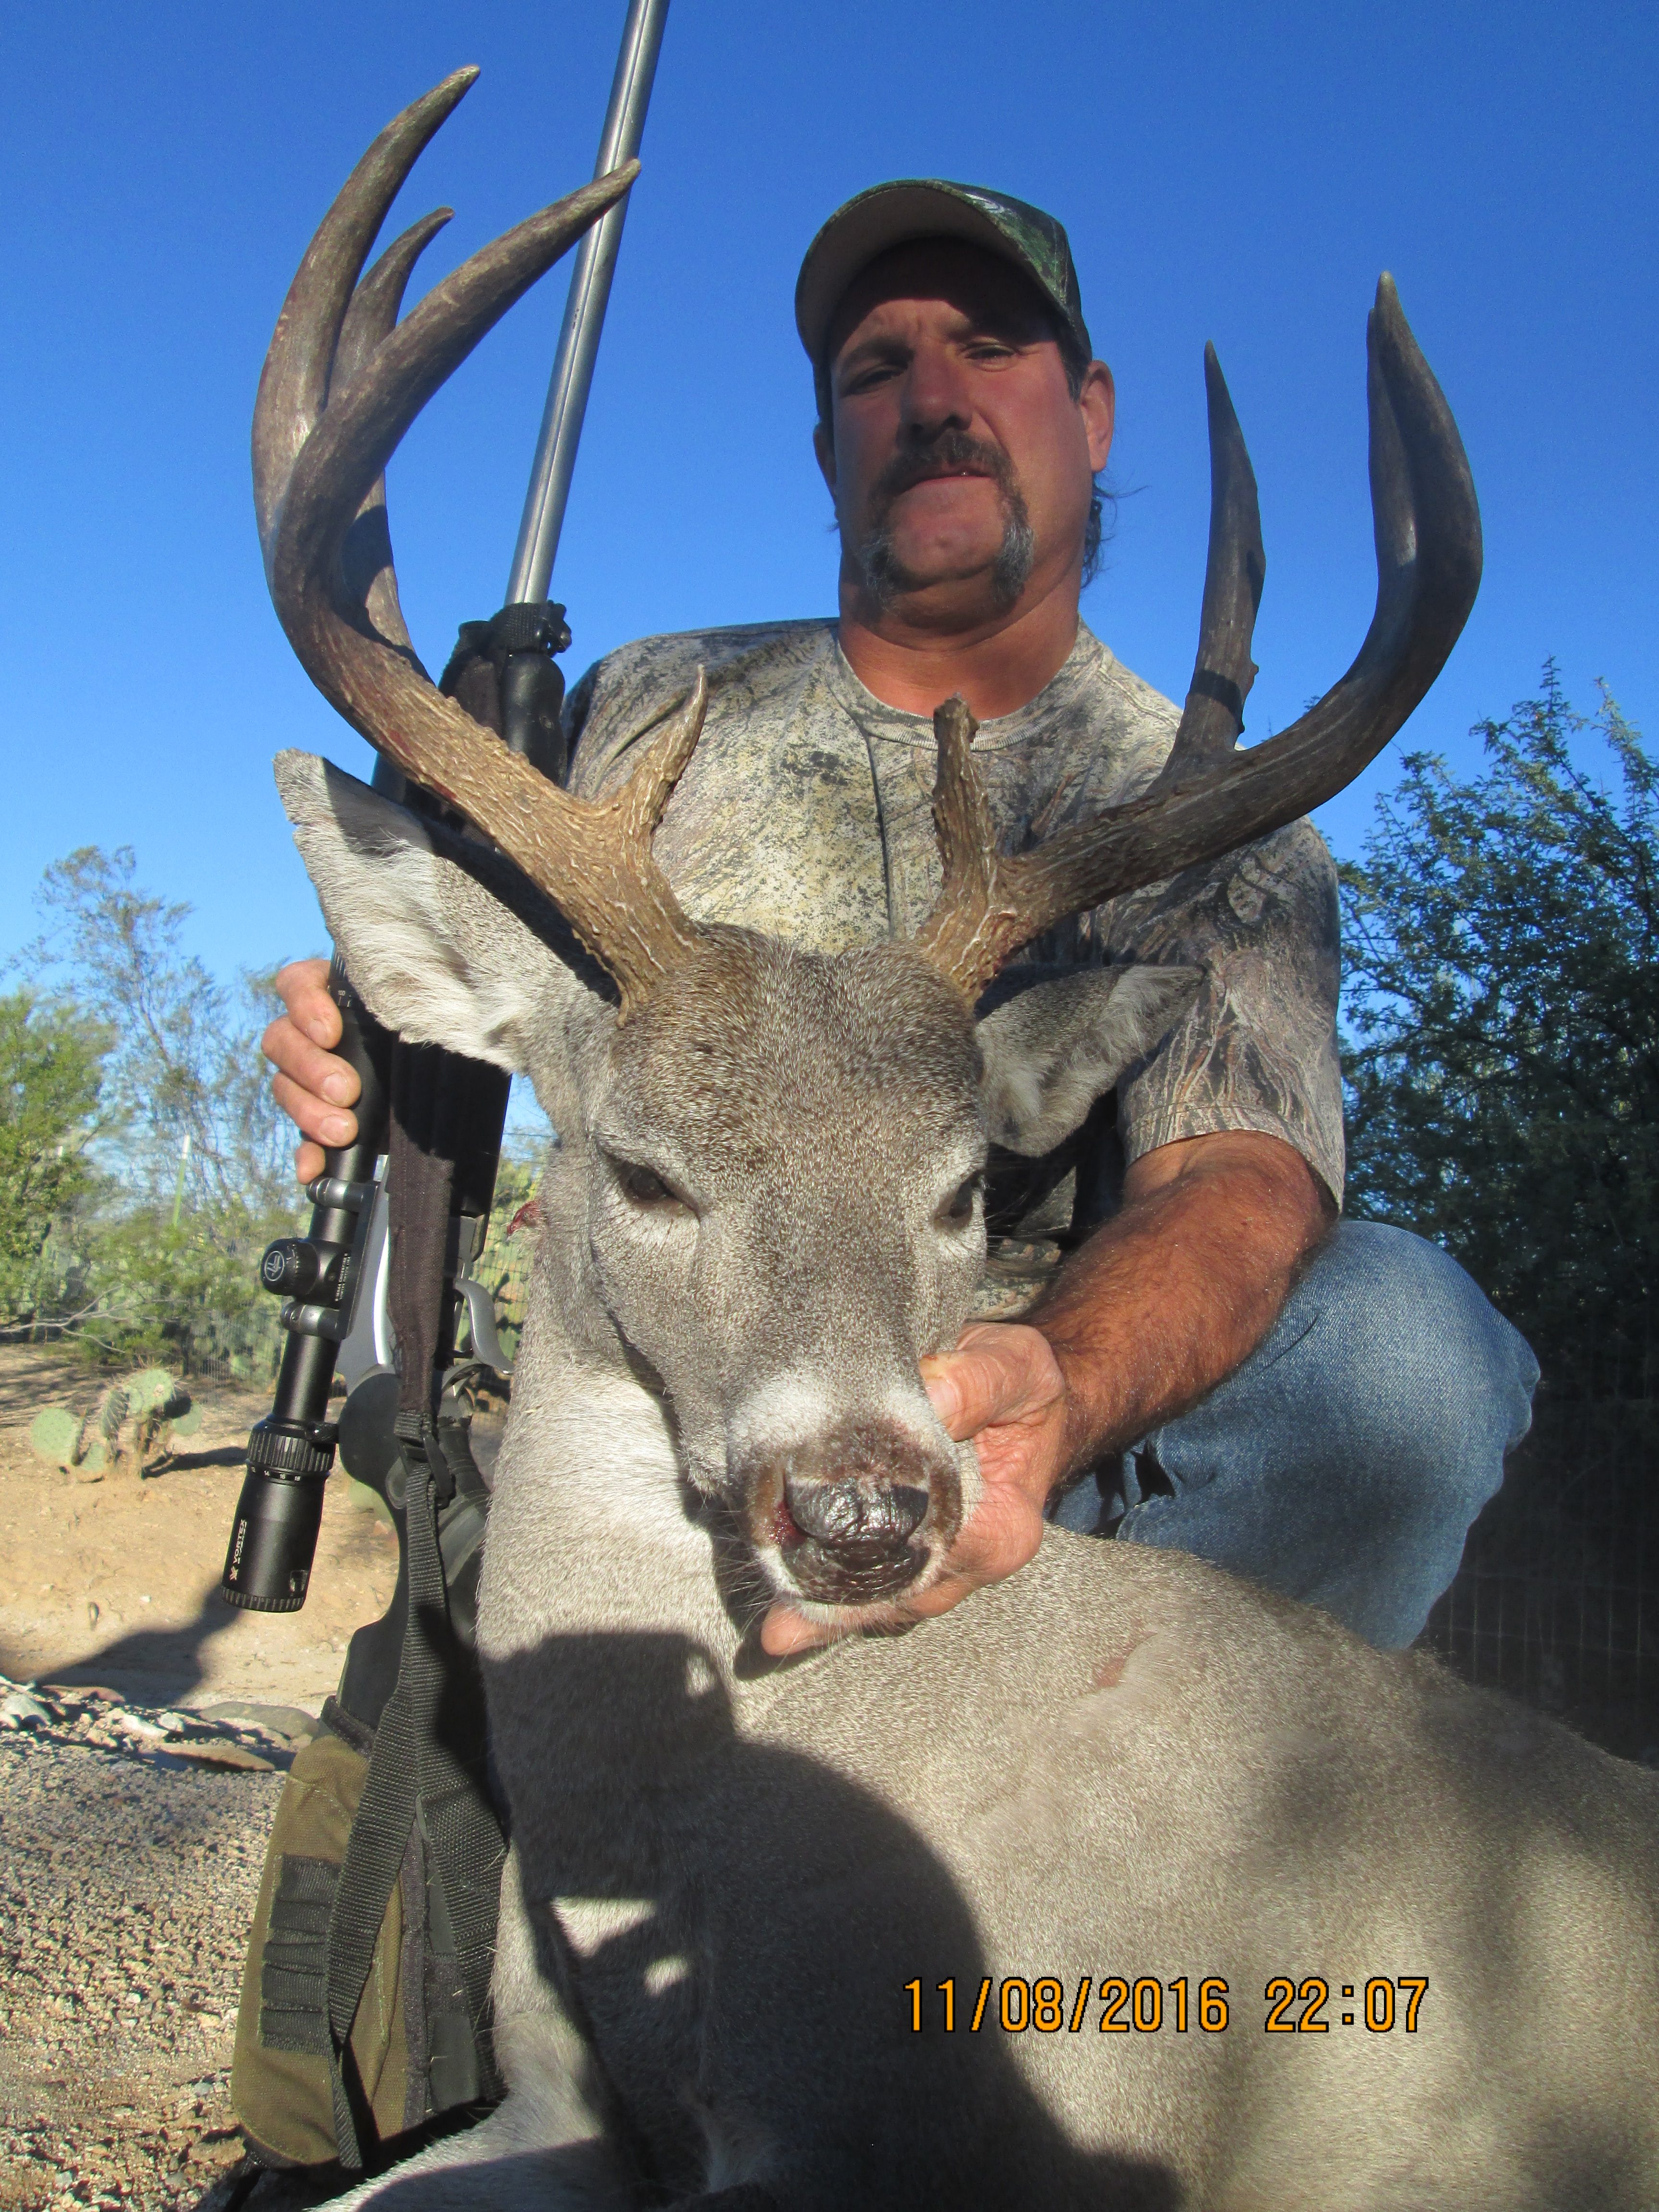
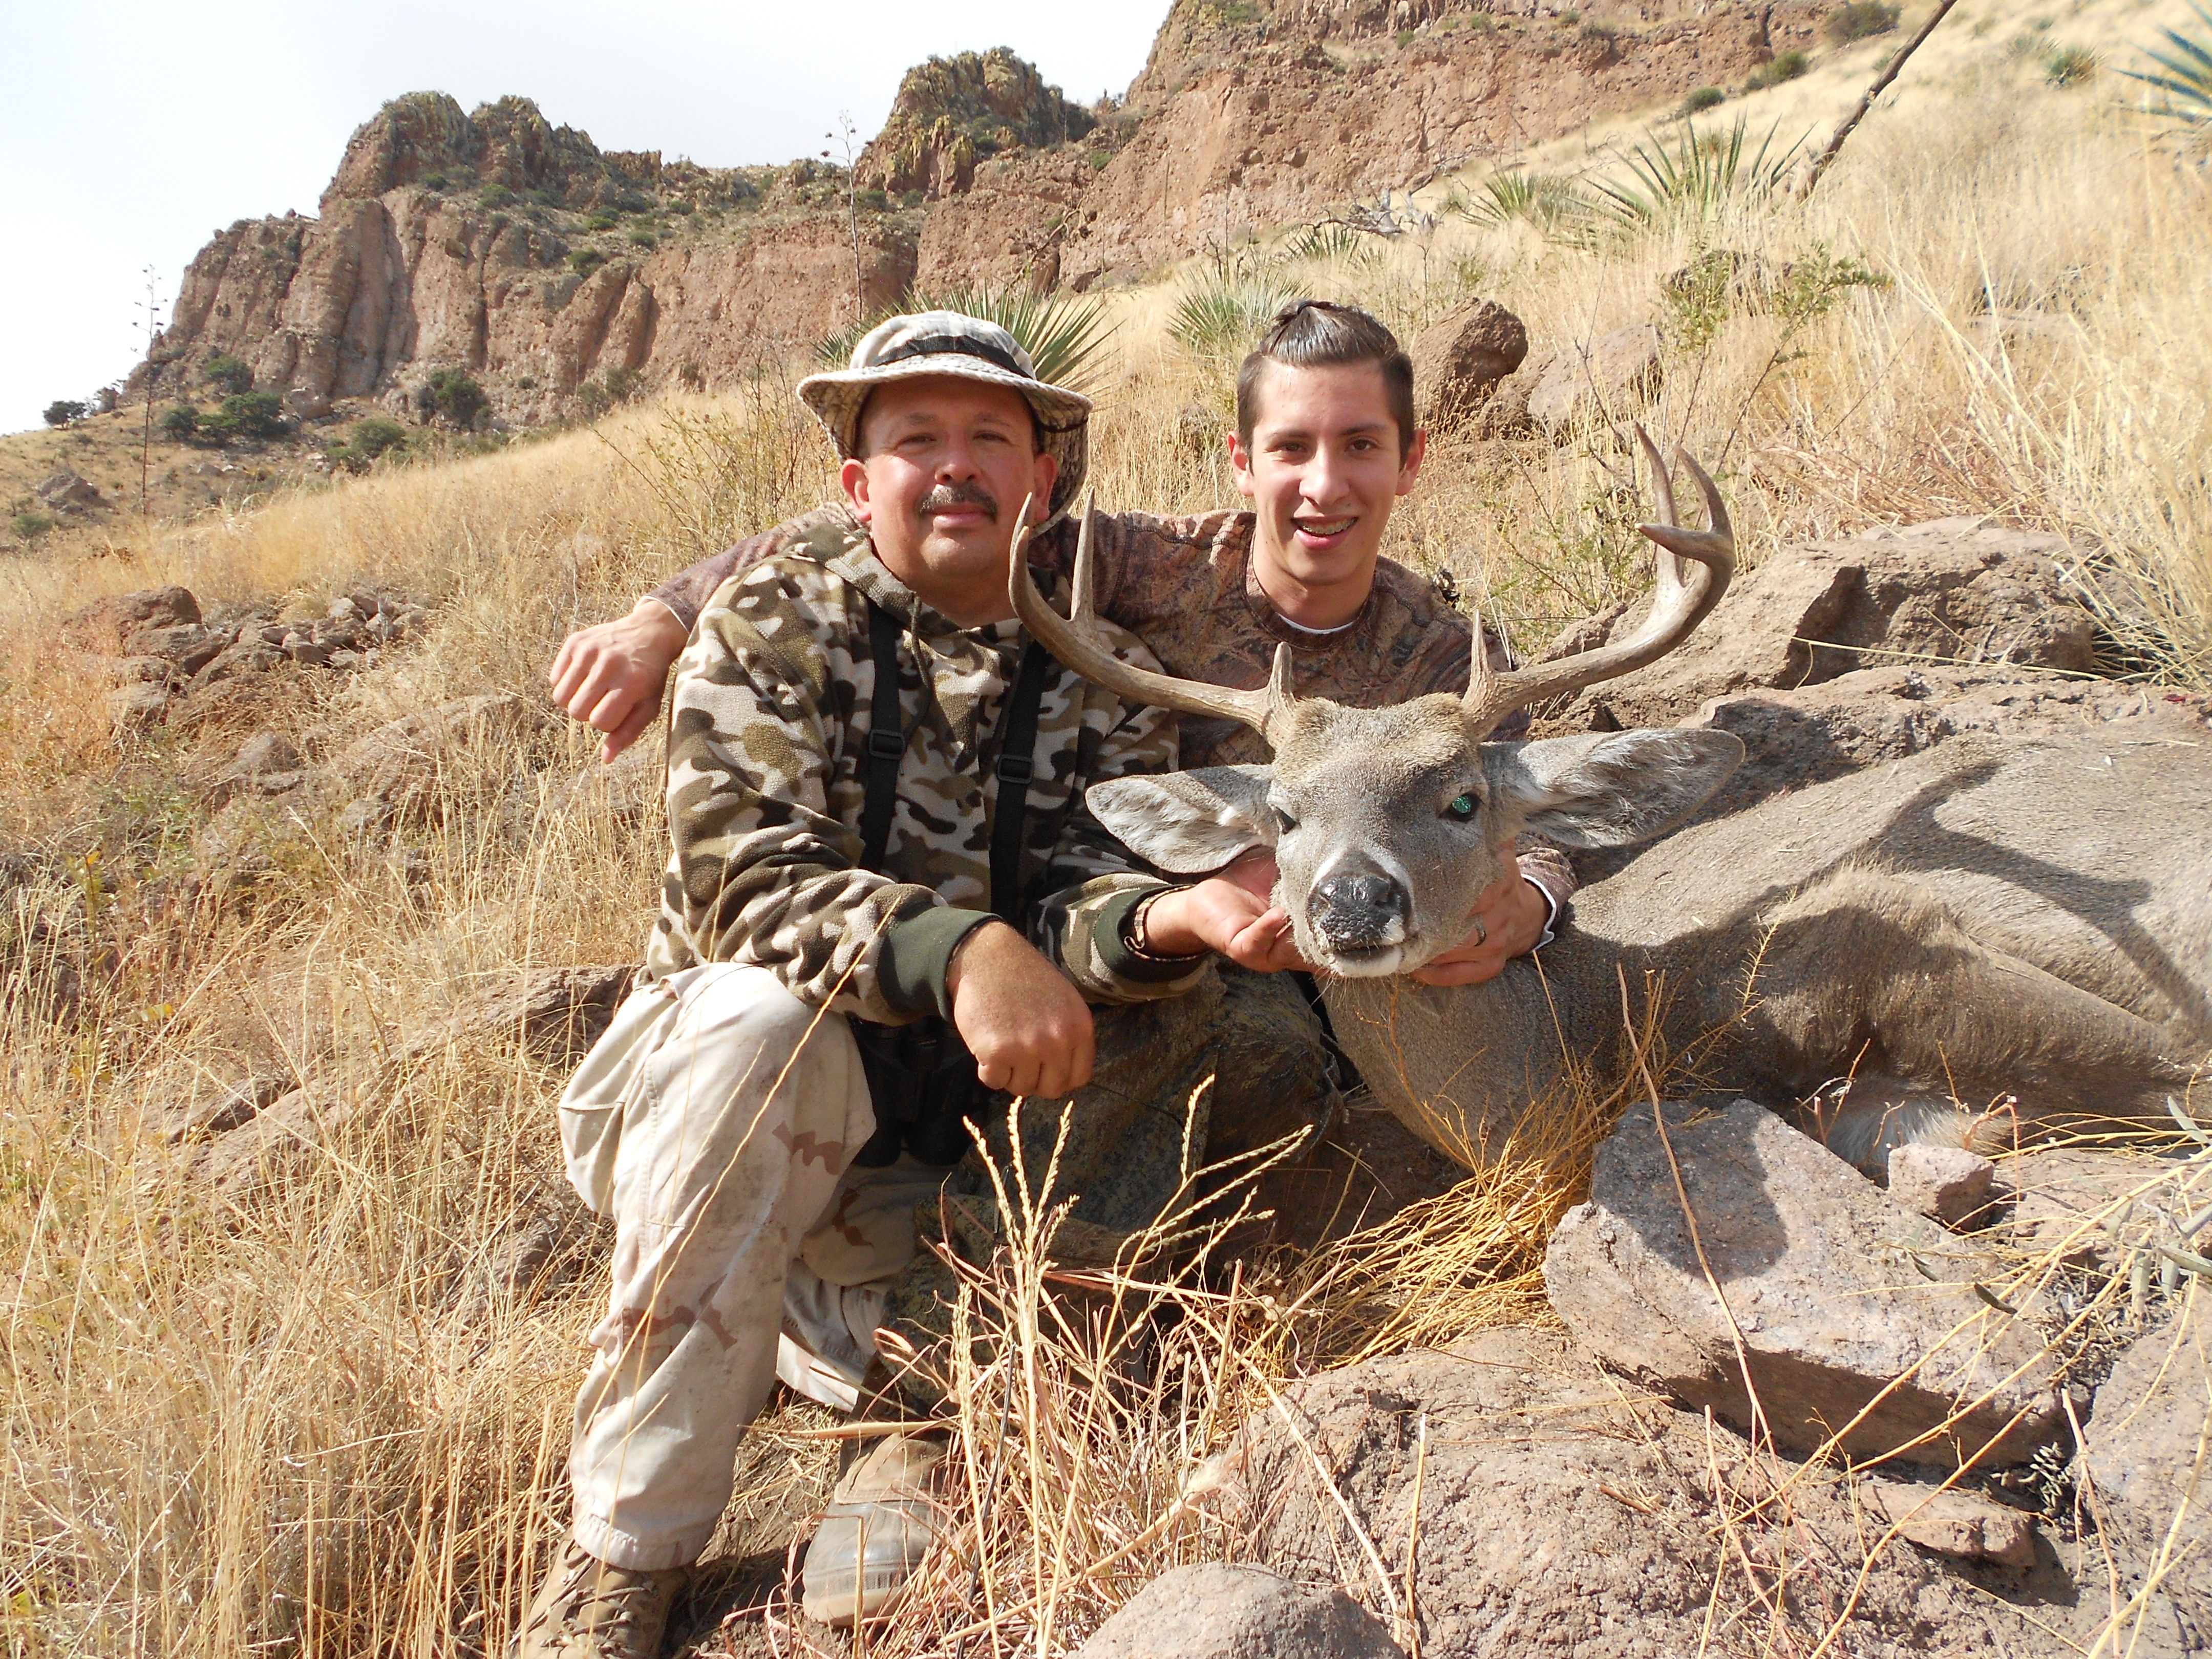
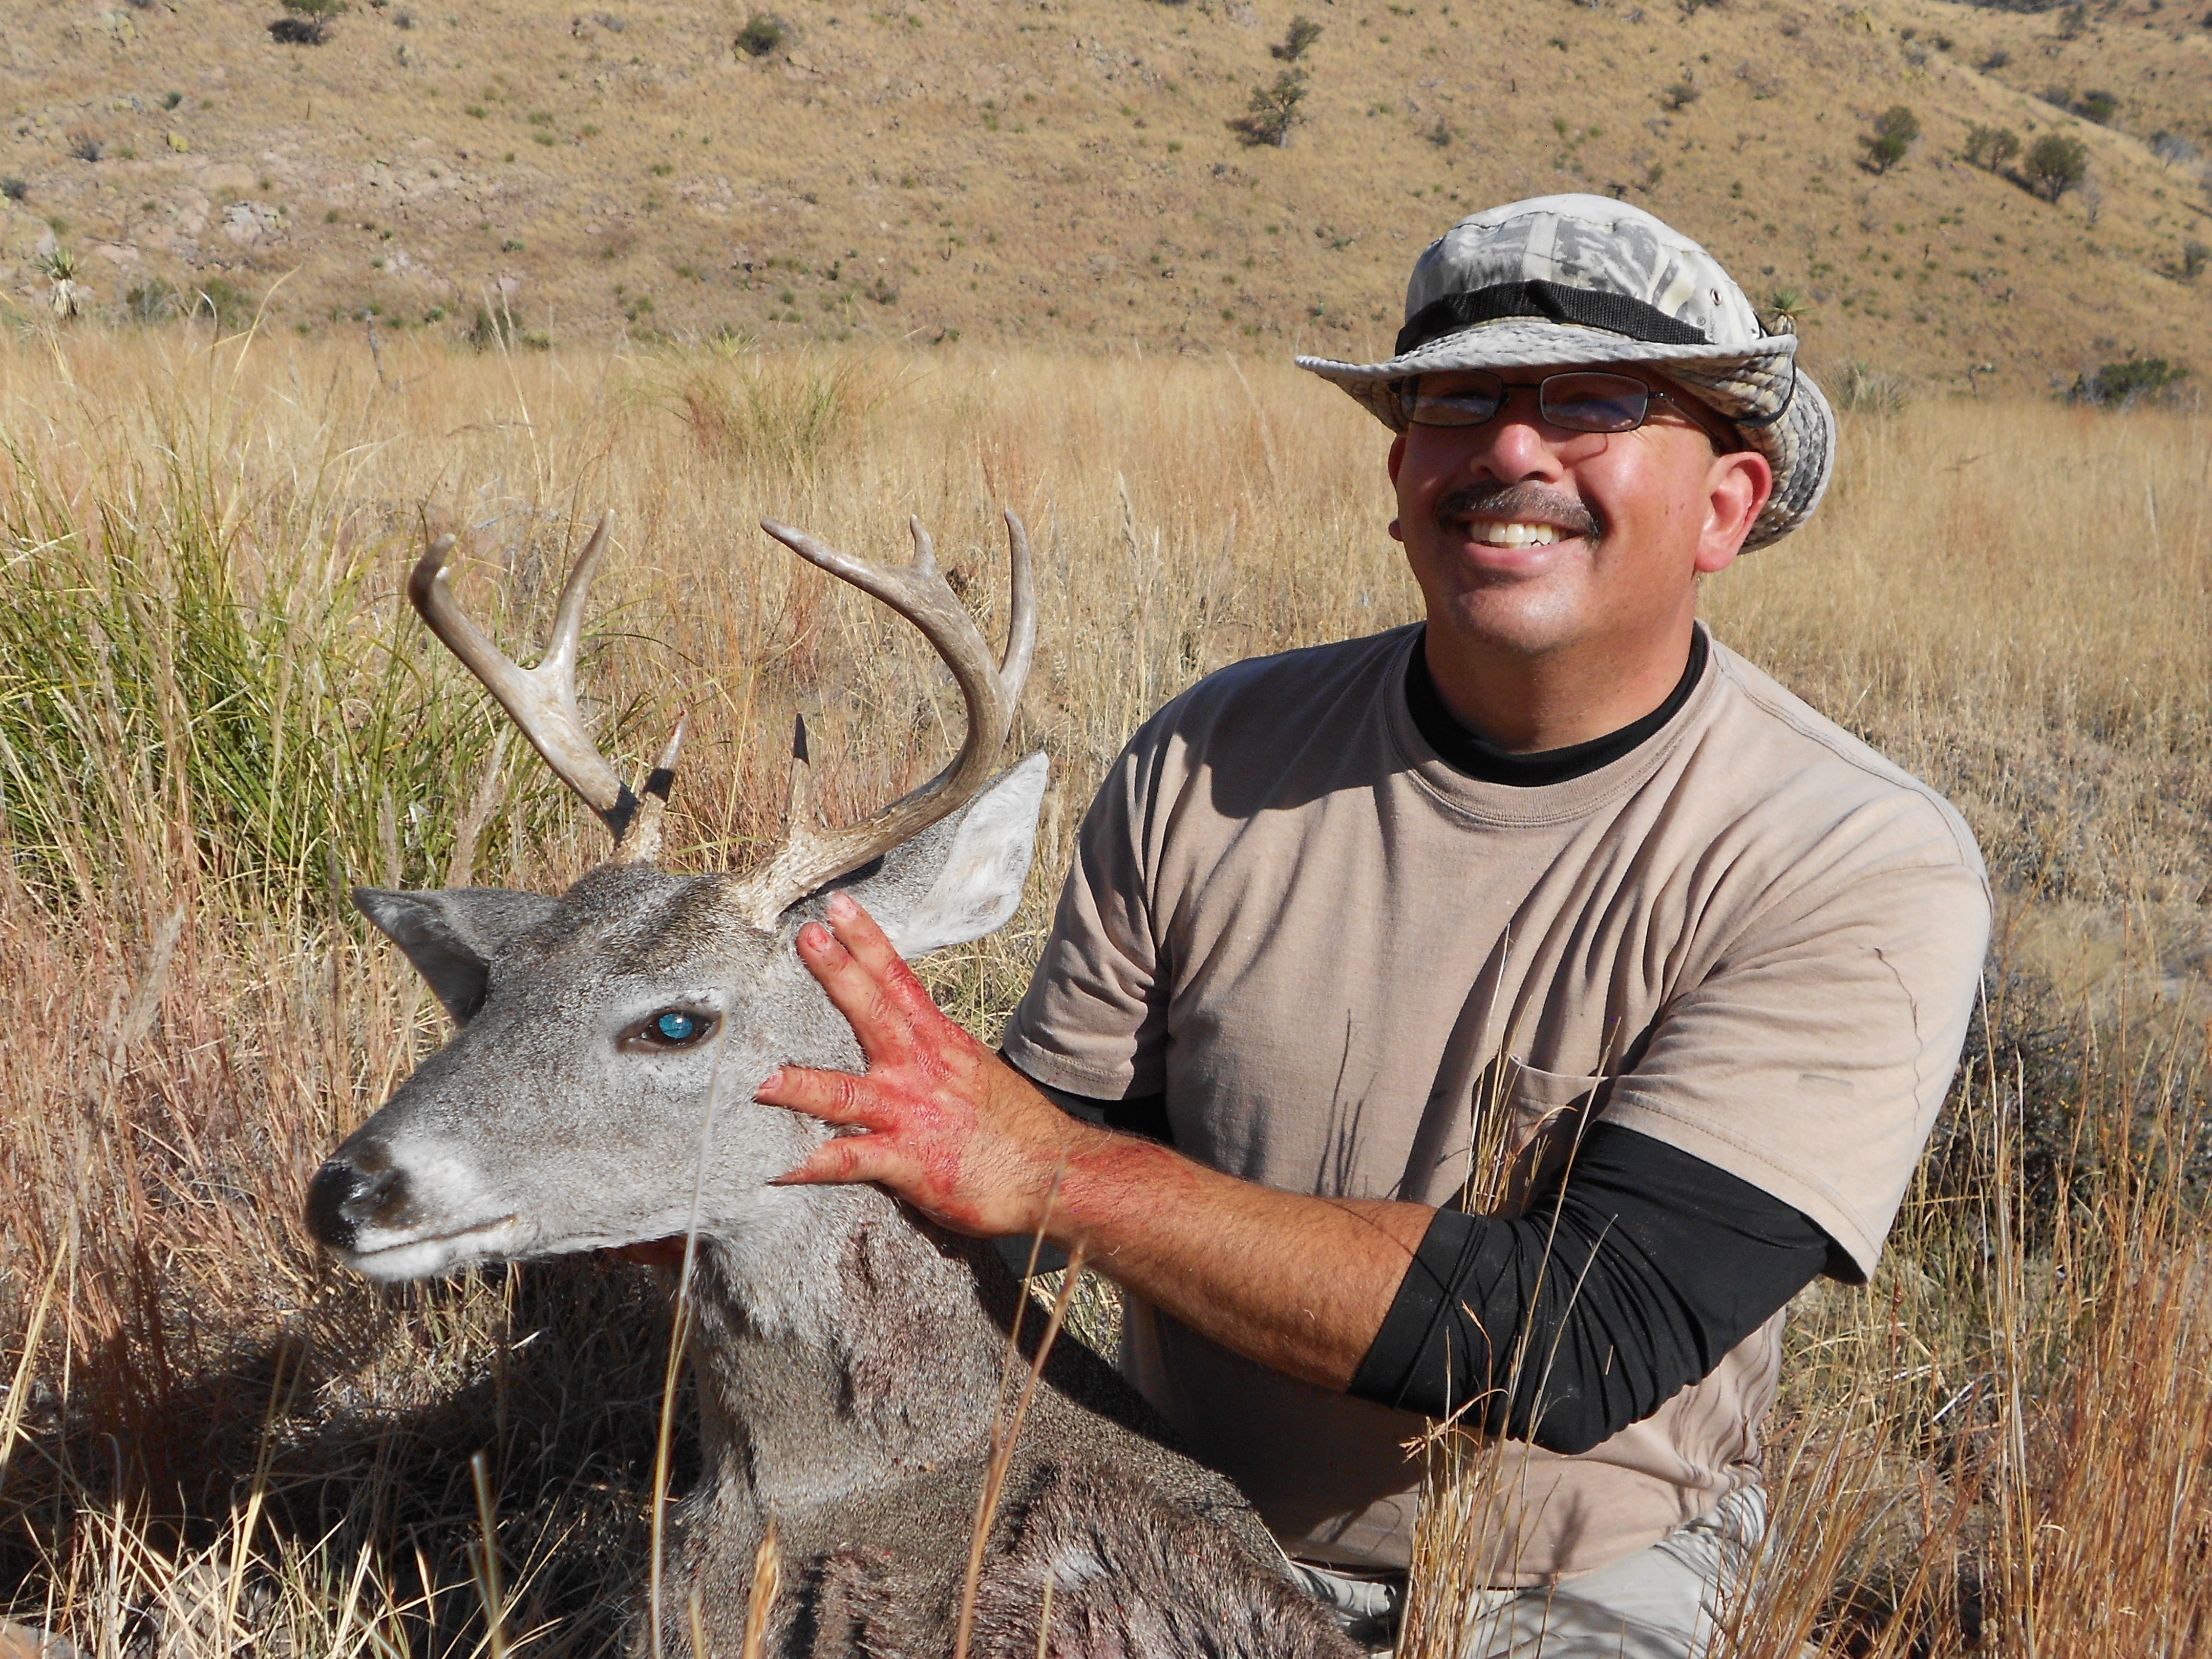
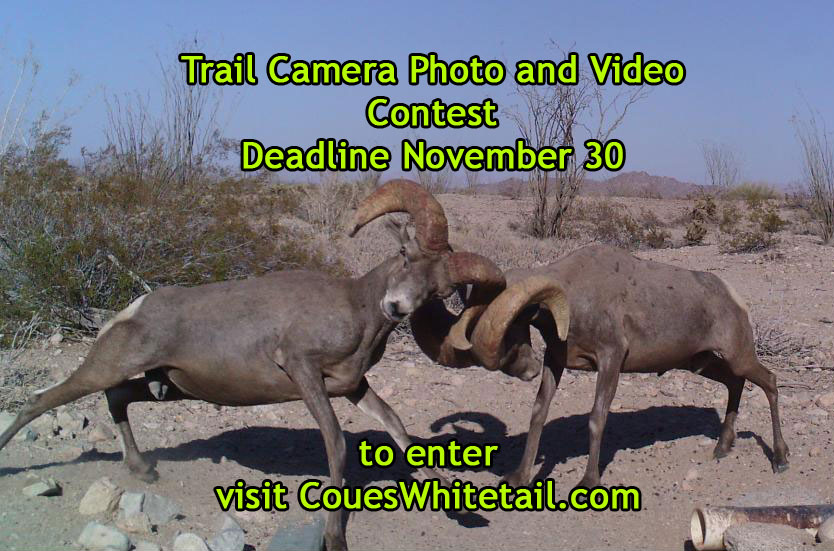